Saturday, November 24, 2012

Apple Cranberry Muffins

A pound of fresh cranberries were a part of this week's box. I popped one into my mouth and got the full dose of that cranberry tartness. I was also taken back to my childhood Thanksgiving meals where a gelatinous can of cranberry sauce was opened and sliced.

I got online and did some researching. Fresh cranberries can be frozen and will keep for up to nine months. Because of its tartness, it is often combined with other, sweeter fruits when making breads or muffins. Because we had a number of apples, I decided to go for this recipe.

This made a dozen muffins and two small loafs of bread. That I stuck in the freezer for the holidays.


Apple Cranberry Muffins

Ingredients:
  • 1 large apple, peeled and finely chopped
  • 2 tablespoons sugar
  • 1 teaspoon cinnamon
  • 3 cups flour
  • 1 cup sugar
  • 3 tablespoons baking powder
  • 1 teaspoon salt
  • 4 eggs lightly beaten
  • 1 cup vegetable oil
  • 1/2 cup cranberry juice
  • 1/2 - 1/3 cup finely chopped cranberries
  • 3 tablespoons vanilla extract (yes, 3. Not a typo)
Directions:
  • Preheat oven to 350 degrees.
  • Combine apples, sugar (2 tbsp.), and cinnamon and set aside.
  • Combine flour, sugar, baking powder, and salt in a large bowl.
  • Combine eggs, oil, cranberry juice, cranberries, and vanilla extract in a bowl.
  • Slowly pour the egg/oil mixture into the flour mixture stirring until fully mixed together
  • Grease the muffin pans
  • Fill about 1/3 of pan with the batter and then spoon a tablespoon of apples into the batter. 
  • Make another pass with the batter covering the apples and filling up the muffins about 2/3 full.
  • Bake for 30-35 minutes

Saturday, October 13, 2012

Banana Bread


We always buy a bunch of bananas to include in the lunch bag for work. Sometimes, though, other fruits get selected for lunch instead.  After a number of days, those slightly green bananas are now spotted, brown, and tired. This recipe is for those bananas. If you have at least 3 over-ripe bananas then you should be thinking about bread instead of tossing them.

I was recently in that position with 5 bananas going brown on me. So I turned to my basic banana bread recipe.

The best thing about banana bread is that it's meant to be shared. I like to use a mini-loaf pan (like this one) because there is usually no waste involved. They are the perfect size to share with co-workers or neighbors without overwhelming them. Plus, I think the small size keeps it from drying out.

This is a basic recipe and it's a good one to try out with your own personal variations. Some links below give some additional ideas.

Banana Bread

Ingredients:

  • 3-5 bananas (over-ripe with some browning on the peel)
  • 1/3 cup melted butter
  • 3/4 brown sugar
  • 2 eggs
  • 1 tsp. vanilla
  • 1 tsp. baking soda
  • pinch salt
  • 1 tsp. cinnamon
  • pinch cloves
  • 1 1/2 cup flour
Instructions:
  • Preheat oven to 350
  • In a large bowl, smash peeled bananas into chunks
  • Add butter and continue to mash
  • Add seasonings, vanilla, sugar, eggs, and baking soda mix together
  • Add flour and mix
  • Ladle the batter into your bread pans
  • Cooking time will depend on the loaf pan size. I used a pan with 8 mini-loaves and it was about 45 minutes. Larger loaf pans make take 50 minutes or more. Use a toothpick to test for doneness (it should come out clean).
  • When done, remove from oven and let cool

Inspiration:

Saturday, October 6, 2012

Apple Pie Filling

My posts a few years ago had me troubled about my new apple tree. In its first few years it did not produce a whole lot of fruit. Maybe I was not giving it proper care or maybe it just needed a few years to mature. I'm not sure but this year I got a viable crop of apples. The coloring on the peel was still not what I expected but below the peel all was tasty.

A few weekends ago I harvested a shopping bag full of apples. In an earlier post, I had thought that I'd turn all my apples into canned applesauce, but some internet research got me interested in canned apple pie filling. I used most of my apple crop to make the 3 + quarts of apple pie filling. The rest will become applesauce. I was able to take some of the overflow apple pie filling to work with some yogurt the next day and it was quite tasty.

I won't go into the recipe here. Instead, I will just link you to the informative recipe I more or less followed.

Sunday, September 23, 2012

Why You Should Buy US Shrimp

If you look on the back of a bag of frozen shrimp you're likely to see that it comes from Thailand or Vietnam. The shrimp is good and cheap. However, someone is paying a price: children and workers.
Domestic shrimp is sometimes harder to find and more expensive than imported shrimp but I hope you will consider going the extra mile and paying the additional money after reading this article.

http://www.sfgate.com/default/article/Thai-shrimp-industry-exploits-workers-3882500.php

Sunday, September 9, 2012

Canning Applesauce

A friend recently brought by a dozen apples from the tree in his yard. I had no idea what kind they were but they joined an already full plate of fruit from a variety of sources.

My own apple tree is getting close to harvest-time so I thought this might be a good test run on canning some applesauce.

So I ran down to my local hardware store and picked up a dozen half pint jars. I came home and stuck some in the dishwasher to get them sterilized. I followed my earlier recipe for applesauce again using some honey in lieu of sugar. In order to can the applesauce, follow the earlier recipe and then add these steps.

Once the applesauce is processed, bring the applesauce back to a boil. Using a canning funnel, ladle in the hot applesauce into sterile jars leaving a half inch of head space. Use a wooden chop stick or other non-reactive utensil to stir out any air bubbles. Clean the rim and screw on sterile lids.

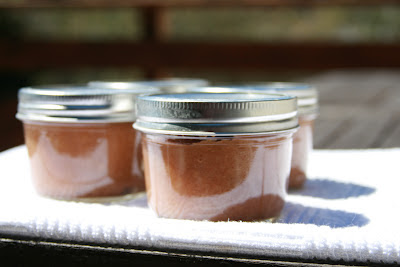
Set the jars in a boiling hot water bath for 20 minutes. Remove them from the water and let cool on a towel for 12 hours. Check that the lids sealed. Put them away to enjoy in a future recipe.

Saturday, September 1, 2012

Canning Peaches

Last year, I made jam out of the peach harvest. I still have some jars in the pantry. This year's harvest was just canned over the last two weekends. It was quite an event with multiple pans going all at once: the hot water bath pan, a saucepan to boil the lids, boiling water to dip the peaches into, and a simple syrup.

I have an old Ball Blue Book from the '50's and it's pretty much the bible for canning. When I went online and looked canning peaches, it's amazing how little has changed. If you don't have this book, you need to get a copy.

So here are the "cheat sheet" directions

  • Drop batches of peaches into boiling water for about 1 minute and then transfer to a bowl of ice water. The riper the peaches, the easier the peel will come off.
  • Remove skin; halve and pit; place face down in a sterile jar. You may need to quarter the peaches.
  • Gently push down on the peaches to maximize the space as you begin to fill up the jar.
  • Ladle in syrup to cover leaving about a 1/2 of head space.
  • Run a knife along the inside edge of the peaches to remove air bubbles.
  • Clean the rim of the jar with a damp paper towel.
  • Put on the lid and drop into a boiling water bath with a water level above the jar lid.
  • Boil for 30 minutes and remove.
  • Place jars on a towel to dry for 12 hours.
  • Listen for the "pop" of the jars as the lids seal as it cools.
For this first time run, I went with the extra light syrup and I had to make a second batch:

Syrup
  • 1 1/4 cup sugar
  • 5 1/4 water
Add sugar and stir until dissolved. Bring to a boil and ladle into jars.

Here's the formula:
Extra light = 1 1/4 cups sugar to 5 1/4 cups water
Light = 2 1/4 cup sugar to 5 cups water
Medium = 3 1/4 cup sugar to 5 cups water
Heavy = 4 /1/4 cups sugar to 4 /1/4 cups water


Here are some YouTube videos that demonstrate the process.

http://www.youtube.com/watch?v=KoyEV0p0Ky8

http://www.youtube.com/watch?v=G309JyFpuFs


Monday, August 27, 2012

Fall Garden

Here's a great article on planting fall veggies. If you live in California, there's lots of details on the various microclimates.

Most of my summer plantings are moving into their dying off mode. I need to find the time to get outside and pull up crops in order to make room for the next wave.

Read the article from the SF Chronicle

Tuesday, July 10, 2012

Roasted Pistachios

A few months ago I needed some raw, shelled pistachios for a cold soup recipe I was working on, but I bought waaaaay more than I needed at the bulk foods section of my local Whole Foods. It was a little like buying way more ahi tuna or premium gasoline these days. I don't remember the exact price but it wasn't cheap.

But I ended up with 4 or 5 cups of leftover pistachio nuts after I made the soup. They have been sitting in the pantry waiting for me to figure out how to roast them which I finally did today. Since they are already shelled, I feel like have a few month's supply of pistachios.

Pistachios, like almonds, are quite nutritious with lots of fiber, vitamin B6, thiamin, copper, and phosphorus. Most of the fat is monounsaturated, similar to olive oil.

So thanks to a handful of internet sites, this is how I roasted the pistachios. Tasty!


Roasted Pistachios

  • Preheat the oven to 250 degrees
  • Dissolve 2-3 tablespoons salt in 1/4 cup of water in a wide-based saucepan. For salt, figure 2-3 tablespoons for 5 cups of pistachios and up. Use that as a starting point and adjust to your tastes and the amount of pistachios you have.
  • Add pistachios to salt water and heat the saucepan to high heat
  • Stir constantly until water is evaporated and the salt water is distributed all over the nuts
  • Spread on cookie sheets and smooth out into a single layer of nuts
  • Roast for 1 1/2 to 1 3/4 hours stirring every 30 minutes. I ended with two cookie sheets full so it took the longer amount of time. The fun is sampling to decide when they are roasted enough.

Saturday, June 2, 2012

Lazy Saturday Breakfast with Rhubarb Compote

It was a beautiful Saturday morning to enjoy some recently-made rhubarb compote on toast along with some freshly-brewed coffee.

This compote (French for "mixture") is a versatile recipe that could work in a breakfast or a dessert. I cut the sugar level in half from the recipe I found online. I did use real maple syrup instead of sugar, too. The result is a simple, not overly-sweet concoction.

For breakfast, serve as pictured on toast or with a muffin or scone.

For dessert, spooned over a simple cake or corn bread. It could also be served atop some vanilla ice cream.

And did you know that rhubarb is widely considered a vegetable, but in 1947 a New York court decided that it's used like a fruit so they ruled that rhubarb is a fruit in the US for the purposes of duties and regulations.

Basic Rhubarb Compote


Ingredients:
  • 5 or 6 rhubarb stalks, washed and chopped
  • 1/2 cup orange juice
  • 1/4 cup maple syrup or brown sugar
Directions:
  • Combine all of the ingredients in a medium saucepan.
  • Bring to a boil over medium heat, stirring occasionally.
  • Cover and simmer gently for about 5 minutes or until rhubarb softens.
  • Uncover and continue to cook for another 5 minutes.
  • Remove from heat and let cool.
See also:
http://www.simplebites.net/salute-spring-ten-ways-to-enjoy-rhubarb-compote/

Sunday, May 20, 2012

In the Garden: May 2012

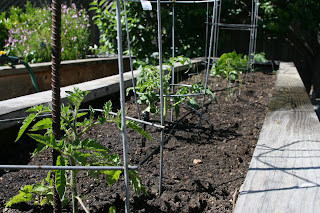
The summer vegetable garden was installed over the last two weekends. I also got some mulch to put over everything (not pictured).

Now in the ground:
  • San Marzano tomato - looking forward to trying this famous varietal.
  • Roma tomato - Hope to make some more spaghetti sauce.
  • 2 Green beans - Thought I bought one but when I got home there were two.
  •  Zucchini - Of course.
  • Leeks - First time trying these. I use them in my homemade broth.

  • 8 Italian basil plants - Hopefully, I'll be making lots of pesto for the freezer.

  • Bell Pepper in a nearby pot - I've got a lot of potting soil and a lot of empty pots so I may try some more plants in pots.

Thursday, April 12, 2012

Adapted Parkey Stew

Cabbage can be a bit of a struggle. Let's face it, when it shows up in the CSA box it's just not that exciting. Sadly, too often, it sits there in the fridge until it's too late.

I've been looking for some go-to recipes for cabbage so that we could use it and enjoy it when it's in the delivery. I know it's good for you and all that. So I've tried a few approaches to come up with something tasty for cabbage but nothing has done the trick for us yet.

Until...

A few months ago, I was paging through the Penzey's catalog (Winter 2012) and saw this recipe for Parkey Stew which was named after this person's grandfather. This recipe was for a cabbage stew that I knew I could adapt to our tastes and it might be that elusive go-to recipe for cabbage. I cut it out and added to my notebook of recipes to get to (most of which haven't been gotten to).

The basic idea is kielbasa and cabbage in a tomato and broth base. And it worked!

Below is just my starting point and my first adaptation of the original recipe.

Adapted Parkey Stew


Ingredients:

  • Olive oil
  • Carrots - 3 to 4, peeled, and quartered and chopped into fingers
  • Garlic - 2 to 3 cloves, minced
  • Broth - 16 oz. 
  • Tomatoes - 1 15 oz. can crushed or diced tomatoes. Some brands have extra herbs and ingredients.
  • Cabbage - 1 small to medium head of green cabbage
  • Kielbasa - 2 Tofurky kielbasa sliced
  • Herbs - Various - Use what you have - Tonight I used some Foxpoint Seasoning and some Mural of Flavor. Next time would add a few shakes of red pepper flakes.
  • Salt - 1/2 teaspoon
  • Pepper - 1/2 teaspoon
  • Rice - 1-2 cups of cooked rice
  • Parmesan cheese - grated as a garnish
OK, in the original recipe, there were 3 leeks which I skipped because I finally did a good job using them up in the last post. But know you can add them.

I also added the rice to the recipe because we had it as a leftover in the fridge. My wife suggested tossing it in. It was the perfect suggestion since the rice absorbs the flavors and makes it a more filling and satisfying dish.


Instructions:

  • In a medium saucepan, heat olive oil and brown kielbasa slices and then remove
  • Add sliced carrots (and leeks) and cook about 10 minutes stirring often
  • Add the garlic and cook about 2 minutes
  • Add broth, tomatoes, and cabbage to pot along with seasonings and herbs
  • Bring to a mild boil and simmer for 20-30 minutes
  • Add back the kielbasa as the recipe approaches completion
  • Add cooked rice with the kielbasa (optional)
  • When done, remove from heat and let cool a few minutes
  • Top with grated cheese and some freshly grated black pepper

We decided that this was a keeper and it could evolve with time. I think having some strong but not overpowering herbs and spices can take this recipe to another level.

There's lots of room to be creative with this one.


Sunday, April 8, 2012

Leek and Potato Day

The leeks have been coming at us with a steady pace from the box. They were piling up in the fridge, so today was a day of action. Get through those leeks! It started with:

Potato and Leek Frittata


This frittata could have been just a basic leek and potato frittata but I also added some leftover ingredients to help clear out the fridge
  • Get some herbed butter melting in a professional medium skillet (one that can go directly into the oven)
  • Preheat oven to 400 degree
  • Peel some potatoes, dice them, and get them started in the skillet. I used 3 medium red skin potatoes that came in the box
  • Clean and slice the leek and add them to the potatoes and butter
  • Chop up some onion or shallots
  • Chop up a leftover Tofurky sausage
  • Dice a leftover bell pepper half
  • Toss everything in the skillet with the potatoes and leeks
  • Add some salt and pepper along with some Foxpoint Seasoning
  • Add some freshly chopped basil
  • Crack four eggs into a bowl and mix well along with some parsley and black pepper and a generous splash of milk
  • Add egg mixture to the skillet
  • Let it start to set on the fire for about 5 minutes or so
  • Sprinkle the top with some cheese. I had some leftover feta
  • Transfer to the oven and cook until the top begins to brown. Around 15 minutes.
  • Remove from the over and let it cool for a few minutes
  • Quarter the frittata and serve 

The evening focused on a new soup that we think we saw in a Sunset magazine. It's a healthy and tasty take on the potato and leek soup that has no cream but uses spinach "making it a beautiful electric green and good for your waistline."

It was a tasty soup and definitely one I'd make again. It's quick, easy, and healthy.

Spinach, Leek, and Potato Soup 


Ingredients:
  • 2 large leeks
  • 2 tablespoons of butter or herbed butter
  • 1/2 teaspoon salt
  • 4 cups broth
  • 1 large golden or white potato - I used the last 4 red skin potatoes from the box
  • 1 8 oz bag spinach
  •  Croutons - optional

Preparation:
  • In a saucepan melt butter over medium heat
  • Add leeks and salt and cook until limp stirring often, about 5 minutes
  • Peel and dice potatoes and add to pan
  • Add broth and bring to a boil
  • Reduce heat and simmer until potatoes are tender when pierced with a fork
  • Add spinach and cook until wilted
  • Puree with an immersion blender

Final score: 4 leeks gone; 1 still to go.

Monday, March 26, 2012

Almond Joy


A few years ago, we got into the good habit of always having on hand a container of roasted, slivered almonds. We always sprinkle some on our nightly salads which we enjoy, European-style, at the end of the meal. The good habit started while I was reading a nutrition book which I had received as a gift. The book confirmed  that almonds are really good for you.

Here's a peek at their nutritional value:
  • Almonds are a great source of Vitamin E and B
  • They are a great source of protein (perfect for non-meat eaters)
  • They deliver a great mix of minerals like manganese, potassium, calcium, iron, magnesium, zinc, and selenium
  • They are rich in acids that help lower bad cholesterol (LDL) and increase good cholesterol (HDL)
  • Almonds are higher in fiber than any other nut
  • One almond is 7 calories
Even though the book said that you lose some of the nutrients when you roast them. We really like extra crunchiness and flavor that's imparted when you roast them. They're just more satisfying.


So here's what I do. I buy a container of slivered almonds. They have none of the brown skin on them (I have a slight allergy to the brown skin on nuts. Hence, you'll never see any recipes with walnuts or pecans here). Preheat the oven to 350 degrees. Spread the almonds on a cookie sheet and spread them out into one layer as best you can. Place them into the oven. You need to monitor them closely because they will over-brown quickly. Total cook time is about 15-20 minutes. You'll notice a wonderful aroma in the oven as they begin to brown. Once you get that aroma, monitor them even more often. When they are done, remove them from the oven and let them cool on the cookie sheet. Once cool, store in an airtight container.

Then enjoy them!


Sunday, March 4, 2012

Tuna Caper Spread on Endive

We got three heads of endive last week in the box and three more this week. For us, endive borders on the "what the hell am I supposed to do with this?" territory. And then there's the eternal question: "How do I pronounce it?"

I have a few saved recipes and all of them call for using endive as an appetizer. So if you too are wondering what to do with your endive, the links below have a ton of recipes and ideas.

http://endive.com/recipes
http://www.belgianendive.com/

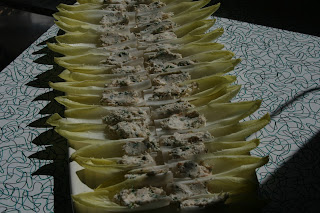
We were going to an afternoon reception and I decided to pair one of my go-to spreads with the endive. The endive leaves are perfect little "boats" that can deliver a variety of flavors to the mouths of your guests. Perfect for parties.

Wash the endive and discard any outer leaves that are blemished. Chop about a 1/4 inch of the bottom and the outer leaves will begin falling away. Continue unraveling the endive. As you get into the middle of it, you will have to cut off the base again.

When it comes time to putting in the contents, it's best to have the leaf in one hand and spoon in your mixture with the other.

Tuna Caper Spread on Endive

Ingredients:
  • Tuna - 1 6 oz. can in water, drained
  • Cream cheese - 4 oz., bring to room temperature ahead of time
  • Olive oil - 1-2 teaspoons
  • Lemon juice - 2 teaspoons
  • Cayenne pepper - about 1/2 teaspoon (depends on your tolerance level. Start with less and build up until you taste it)
  • Capers - 3 tablespoons, rinsed and chopped
  • Parsley - 2 tablespoons, chopped
  • Thyme - 1 1/2 teaspoons, chopped

Directions:
In a large bowl, combine tuna, cream cheese, olive oil, and lemon juice. Mix until smooth. Stir in herbs and capers and continue to mix. Add cayenne pepper until you reach your desired spice level.

Spoon about 1/2 teaspoon or more onto the base of the endive leaves. Artfully arrange on a platter or plate. 


Saturday, February 25, 2012

Potato Salad with Capers and Olives

Here's a lesson in "mellowing" versus "marriage." We were recently invited to a dinner party and I was asked to bring a side. Given that the main course was going to be a bouillabaisse,  I looked for something Mediterranean as well as something that would complement the fish stew. I finally settled on the recipe below because the ingredients screamed traditional and European/Mediterranean. With the recipe description using words like "assertive" and "bold," I knew it would stand up against the bouillabaisse. The recipe said to "let the flavors mellow for 30 minutes prior to serving." So I timed it so that I finished the salad just prior to departure. It "mellowed" for the 20 minute ride to the host's house and then another hour as we had our appetizers.

Driving away from the dinner party, I wasn't real happy with the results. I undercooked the potatoes slightly but that's an easy fix for next time. The main complaint I had was that the flavors just didn't incorporate. "I won't be adding this one to the blog," I thought. I brought home the leftovers, put them in a storage container, and put them in the fridge.

Twenty four hours later, this was a completely different salad. Suddenly, it worked. The ingredients coated the potatoes and they took on new flavors. So the lesson learned is that with potato salad you need enough time to let the potatoes absorb the flavors, to let the diverse ingredients intertwine and become one.

The recipe originally comes from the San Francisco Chronicle Cookbook which has become one one of my "go to" cookbooks. The recipe was a little vague at times so I've added some details to the ingredients and instructions. I doubled this one since I was going to need more than the six servings this recipe provides.


Potato Salad with Capers and Olives

Ingredients:
  • 2 lbs. unpeeled white potatoes (I used yellow potatoes since I couldn't find white)
  • 1/2 cup boiling potato water
  • 3 garlic cloves, minced
  • 1/4 cup lemon juice or white wine vinegar (I used a lemon from the box)
  • 1/3 cup olive oil (maybe some truffle oil, too?)
  • 1/2 cup finely chopped Italian parsley
  • 4 oz. jar capers, drained and rinsed
  • 4 oz. Kalamata or Gaeta pitted olives, roughly chopped
  • 4 anchovy fillets, finely chopped
  • salt and pepper to taste

Instructions:
  • Prep all of the ingredients except the potatoes first.
  • Boil the potatoes in plenty of water. Watch carefully and test them often. A toothpick should easily pierce the potato. 8-12 minutes to put you in the ballpark.
  • When the potatoes are done, remove them and transfer them to cold water. Keep the water boiling.
  • When cool enough to handle, peel the potatoes, chop them into large chunks, and transfer them to a large serving bowl.
  • Add the 1/2 cup of boiling potato water to the potatoes.
  • Add the remaining ingredients and gently toss with large spoons.
  • Cover the bowl and let it mellow at room temperature for an hour or more.
  • Stir it up some more and then refrigerate overnight.
  • Bring it out of the fridge and let the temperature come back up stirring often prior to serving.

Sunday, January 22, 2012

Limoncello 1.0

During the holiday travels from Stockton to Healdsburg, we managed to amass a large number of lemons. All from the backyards of friends and relatives who said, "Please, take some lemons." With all these lemons on hand, I decided to give limoncello a try.

The first time I had limoncello was in Italy. It was homemade by my wife's Italian relatives. It was a powerful but tasty "digestivo" that was served at the end of a meal. He gave me a bottle which survived the suitcase ride back to the States.

I decided to start with this recipe I found on the Food Network by Giada De Laurentiis.

The result was tasty but a little too sugary and not enough kick. So there are some lessons to be learned. But this first taste was right afterwards. The finished product should sit in a pantry for a few weeks to a month to let it mellow.

Alcohol
During the time that this first batch was steeping, I was doing some online research and noticed that other recipes called for 1 bottle of vodka and one bottle of everclear (or sometimes grappa). I am told that one can get pure alcohol in Europe. Which is probably what I tasted in Italy. I have seen jars of "moonshine" at BevMo so I may try that in version 2.0.

Time
Steeping for 4-5 days is not enough. It should be two weeks to a month in a cool dark place. A few sites recommend using a large sun tea jar so that you can screw it shut.

Appearance
Another thing was the fact that my limoncello was clear. The limoncello I remember was opaque. Now it is possible that with more steeping time the alcohol may begin to get opaque. This recipe (which is closer to what I'll try next time) says that adding the simple syrup while it's warm will make the mixture opaque.

Links
This is a great site that clearly explains all of the steps.
Another excellent site with lots of explanations.
Lots of different ideas in the responses.
LA Times article.
Rick Steves article on the topic.

How to Serve
Keep the lemoncello in the freezer and serve straight up in a small glass after dinner.
You can add a little ice and club soda for a refreshing summer drink.
Here is a site with lots of drink recipes that include limoncello.
Or perhaps a limoncello collins.

Sunday, January 8, 2012

Apple Sharlotka

This time of year, it's easy to get overwhelmed with citrus and fruit. In the box, we've had lots of pears and Satsumas recently. Oranges and lemons are coming in and there are lots of apple varieties still in season.

Our overrunning fruit bowl got a little lighter after a friend sent me this recipe for something called Apple Sharlotka. I had to agree with her that it looked simple, delicious, and not unhealthy. Plus, I had plenty of apples on hand.

A sharlotka is a traditional Russian cake; not unlike the French clafouti. Both are simple, traditional cakes requiring few ingredients and made often to go along with tea or coffee.

The recipe is ripe for experimentation. Try substituting out some of the white flour for a healthier flour. Try some brown sugar instead of white. More nutmeg or cinnamon.

The results were quite tasty. Lots of fruit and not overly sweet.

Apple Sharlotka

Ingredients:
  • Butter or non-stick spray
  • 6 large tart apples, such a Granny Smith
  • 3 large eggs
  • 1 cup sugar
  • 1 teaspoon vanilla extract
  • 1 cup all-purpose flour
  • 1/4 teaspoon nutmeg
  • Ground cinnamon, to finish
  • Powdered sugar, to finish


Directions:
  1. Pre-heat oven to 350 degrees.
  2. Get a piece of parchment paper large enough to cover the bottom of a 9 inch springform pan. Lock the paper and the bottom back into the pan.
  3. Butter or non-stick spray the bottom and sides.
  4. Peel and core the apples. I used an apple slicer/corer which made 8 slices. I sliced those once again to make 16 slices and then chopped in the opposite direction making 4 or 5 chunks per slice. Add apple chunks to the springform pan.
  5. In a large bowl add eggs and sugar. Using an electric hand mixer beat the eggs and sugar until they are well blended. 
  6. Add in the vanilla and nutmeg.
  7. With the mixer still going, add in the flour one tablespoon at a time mixing well before adding the next. Each spoonful will add more thickness. When all of the flour is in you may be asking yourself, "Is this cake mixture or drywall compound?" Meanwhile, slowly spin the bowl while mixing searching for hidden bits of flour on the bottom.
  8. Pour the mixture over the apples and use a spoon to thoroughly mix the apples and the batter. Take the time to evenly distribute the batter throughout.
  9. Bake for 55-60 minutes, or until a toothpick comes out clean.
  10. Remove from the oven and let it cool in the springform pan for at least 10 minutes. 
  11. After cooling, run a kitchen knife between the cake and pan. Unlock the pan and remove the side. Flip cake onto a dinner plate and remove the bottom and the parchment paper.
  12. Dust with cinnamon and powdered sugar.

Thursday, January 5, 2012

Delicata Squash with Quinoa Pasta

This evening's weeknight meal was a mix of trying to make a decent meal and trying to clear out the fridge with its mix of post-holiday ingredients. Not only that, it's illustrative of how I sometimes cobble together a weeknight meal.

It started with that Delicata squash that's been staring at me every time I come into the kitchen from last week's box. OK, you are the main ingredient tonight. How about sauteed squash over pasta, I thought. A quick check of the pantry confirmed that there were lots of pasta choices, including our favorite quinoa pasta. A plan was unfolding.

Cutting and cleaning the squash got me thinking that there needs to be a counterpoint. Going through the fridge, I noted a few jars of sun dried tomatoes. Nearby were the remains of some oldish goat cheese that can add that creaminess. And there's that bunch of spinach from last week and we're getting another bunch tomorrow. Now we're getting somewhere.

How to tie all these disparate ingredients together? There's the last of some remaining pesto from another holiday meal. Perfect.

While the pasta water heated up...
  1. Saute cubed squash in olive oil
  2. Add roughly chopped sun-dried tomatoes and stir
  3. Add some roughly chopped parsley and stir
  4. Add cleaned spinach leaves and stir
  5. Add most of the pesto and stir. Reserve some pesto for the pasta
  6. Season with salt, pepper, and red pepper flakes
  7. Drain pasta and return to pan. Add some oil and pesto and stir to mix well
  8. Plate pasta and top with squash mixture
  9. Top with crumbles of goat cheese
A bottle of 2008 Beringer Alluvium Blanc Knights Valley complements it all.

Addendum

More Delicata Squash recipes:

http://www.101cookbooks.com/archives/delicata-squash-recipes-recipe.html