Sunday, December 26, 2010

Apple Cranberry Crisp


We had a backlog of apples from the box over the last few weeks that we had yet to use. Then a neighbor dropped by with some more homegrown apples. Usually I would make an apple pie in situations like this but I was inspired by this recipe from a fellow CSAer to go for the crisp. I like the idea of incorporating oats instead of just a white flour pie crust. The crisp is a nice, tasty alternative to pie.

As a starting point, I just used the recipe off of the oats box (with a few minor modifications). It says you can also use pears and peaches instead.


Apple Cranberry Crisp

Filling:
  • 6 cups of diced apples, peel on (about 6-8 apples)
  • 1/2 cup dried cranberries
  • 1/3 cup maple syrup (I didn't have any so I used some honey and brown sugar instead)
  • 1 tbsp. lemon juice
  • 1 tsp. vanilla extract
  • 1/2 tsp. ground cinnamon
  • 1/4 tsp. ground nutmeg
Topping:
  • 1 cup Quick or Old Fashioned uncooked oats (I used Country Choice available to Trader Joe's)
  • 3/4 cup brown sugar
  • 1/3 cup flour
  • 1 tsp. cinnamon
  • 1 tsp. salt
  • 1/2 stick of melted butter
  1. Preheat oven to 375. With a small dab of butter grease the bottom of a glass or ceramic 9 inch pie pan.
  2. In a large bowl collect the apple pieces, lemon juice, cranberries, syrup, vanilla extract, cinnamon, and nutmeg. Stir until well mixed. Spread evenly into the pie pan.
  3. Prepare the topping by mixing together the oats, brown sugar, flour, cinnamon, and salt. Add the melted butter and stir until evenly moistened. Spread evenly over the fruit.
  4. Bake 35-40 minutes or until fruit is tender.
  5. Remove from the oven and let stand for 20 minutes

Wednesday, November 24, 2010

Kholrabi Slaw


Kohlrabi arrived in our box for the first time. In appearance, they immediately reminded me of the above characters. I was not familiar with kohlrabi and had certainly never cooked with it before. I checked in some friends who are also getting the FFTY box and the links at the bottom come from them.

Kohlrabi comes from the brassica family and " its origin in nature is the same as that of cabbage, broccoli, cauliflower, kale, collard greens, and brussels sprouts." All of the plant is edible. But by the time I got around to using it the greens had withered. I decided to go with the kohlrabi slaw recipe that was included in the information sheet in the box as a starting point.

As I cut off the top and bottom of the three kohlrabi bulbs there was an aroma of mild horseradish along with a rooty smell that reminded me of broccoli stalk. The flesh was clean, crisp, and crunchy.


Kohlrabi Slaw

  • Peel and shred 3 kohlrabi bulbs
  • Peel and shred 2 large carrots
  • Peel and shred 2 Granny Smith apples
  • Add mayo - the original recipe called 1 1/4 cup. I started with a 1/3 cup and added more until it was to my liking
  • 1/3 cup sugar
  • 1/4 apple cider vinegar
  • I added a few pinches of celery seed just because I had some
  • A pinch of salt
  • Lots of ground black pepper
Mix all ingredients together. Serve immediately or chill in a bowl until ready to serve.

Verdict: Quite tasty! I would make this again. The only downside was that it was a bit watery so next time I would let the shredded contents sit in a colander for a bit.

More kohlrabi resources:

Lots of ideas here in the comments section
http://dorisandjillycook.com/2010/06/21/kohlrabi-international-vegetable-of-mystery/

Lots of links and ideas
http://simplyrecipes.com/recipes/kohlrabi/

Kohlrabi and Mache Salad
http://www.gourmet.com/recipes/2000s/2008/11/kohlrabi-and-mache-salad

Kohlrabi Salad
http://orangette.blogspot.com/2008/11/whole-bowlful.html

Kohlrabi and Apple Salad
http://www.epicurious.com/recipes/food/views/Kohlrabi-and-Apple-Salad-with-Creamy-Mustard-Dressing-10693#ixzz15nC3EReL

Thursday, November 18, 2010

Dormant Spray Schedule

Ever since planting the peach tree a few years back, I've been dealing with Peach Leaf Curl. This last year I tried a single application of a dormant fruit spray but I still had the curl. Our little local newspaper had a short blurb on dormant spraying. This plan looks more promising and is easier to remember. I've added some formatting to make it visually easier to remember.
"Plan your dormant fruit spraying schedule to coincide approximately with cool weather holidays, when the rain lets up for a few days. Specifics cues are the fall of the last leaves (Christmas), the height of dormancy (New Year's Eve), and when buds swell, but before they show color (Valentine's Day). Spraying at the precise period of bud swell is particularly important--after the blossoms open is too late."

Monday, October 25, 2010

Spaghetti Sauce - Batch #1


Another first!

My first batch of homemade spaghetti sauce! I ended up with 3 pints to put away for another day. I merged a couple of online recipes and came up with the following.
This is only batch #1 so it may evolve.

Homemade Spaghetti Sauce
  • 40 - 50 tomatoes - mostly Romas from the backyard
  • 1/2 large yellow onion, chopped (probably more next time)
  • 1/2 red bell pepper, finely diced
  • 2 - 3 cloves garlic, minced
  • 1 small can of tomato paste
  • 10 - 12 basil leaves, finely chopped (also from the backyard)
  • 2 bay leaves
  • 1/4 teaspoon freshly ground black pepper
  • 1 tablespoon Italian herb mix
  • 1 tablespoon oregano
  • 1/4 teaspoon red pepper flakes
  • 1 teaspoon parsley
  • 1 teaspoon salt
  • pinch of sugar
  • 1/4 cup red wine (a 2007 Christopher Creek Cab from the cellar)
I washed and dried the tomatoes and then put them through the food mill. I got the sauce boiling so that it began to cook down and added the bay leaves, salt, and sugar. Meanwhile, I chopped up all the other ingredients. In a 12" skillet, I sauteed the onions for a few minutes, added the garlic, and then the bell pepper. Added in the herbs and seasonings. I waited until the sauce was about an hour or two away from being done and then added the onion/pepper mixture from the skillet. Add the tomato paste and let it cook down until desired consistency. Discard bay leaves. Add sauce to sterilized jars.

Inspiration:

http://www.pickyourown.org/spaghettisauce.htm

http://www.suite101.com/content/homemade-spaghetti-sauce-a61353

Monday, October 11, 2010

Tomato Sauce, Part 2


With so much produce coming from the backyard, I have wanted to learn how to can for a few years now. I bookmarked this helpful site along with some others to help me learn the process. I've been buying used books on canning and preserving and, of course, have Ball Blue Book which is THE source of information on canning (although I'm told it's too cautious). I've also been slowly acquiring all of the needed equipment. Most of it through this interesting store based out of Ohio called Lehman's but also through antique stores. Last year, I spent an afternoon with a friend who has been canning for years to see it all in real life.

I finally took the plunge a few weeks ago when I was given four plastic shopping bags full of ripe tomatoes. So for the last few weeks I have been making a basic tomato sauce. So far, no explosions in the pantry. Why not make it into spaghetti sauce or something else? I will try that at some point but with basic tomato sauce you can let it be whatever you want it to be when you open the jar.


Here's what I have been doing.

Basic Tomato Sauce
  • Start with ripe tomatoes and lots of them. Wash the tomatoes ahead of time and let them dry.
  • Core the tomatoes and cut in half or quarters depending on the size. Be sure to cut off any blemishes on the skin.
  • Put into the food mill to separate seeds and skin from meat. A few years back I bought this food mill and find that I don't need to peel the tomatoes ahead of time. It does a great job separating the skins and the seeds from the pulp. Put all of the pulp into a pot (or two, if necessary) and bring to a boil. Reduce heat so that the tomato sauce is bubbling gently and moving around the pot.
  • Put more than enough jars in the dishwasher to sterilize.
  • Cook until reduced until it reaches desired consistency. If you look around online, you'll see some people saying one hour and others saying six hours. It all depends on how thick you want it. I like it pretty thick so I let it go for a few hours.
  • Towards the end of the cooking time add 1 small can of tomato paste.
  • Put the lids in a small pot with gently boiling water.
  • When sauce is done, spoon hot sauce into hot jars to 1/4 inch below the lid line using a jar funnel. Fish the lids out of the boiling water. Seal jars and turn upside down on towel for a period of time to sterilize the trapped air and lid.
  • Upright the jar and let cool at room temperature. After they have cooled down check the seal.
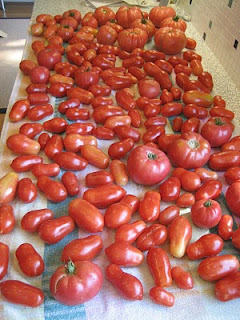
The tomatoes in the top photo are from my backyard this last weekend. All of those tomatoes yielded two quarts of sauce.

Wednesday, October 6, 2010

Tomato Sauce

How many tomatoes does it take to make a quart jar of plain tomato sauce?

I figure 80 to 100. This is based on the fact that I brought home about 200-250 tomatoes from a friend's house and made two batches of tomato sauce and ended up with two quarts of sauce (well, plus some extra sauce that I put in a freezer bag).

This was my first venture into canning. I've been prepping for a few years. That's how nervous I was. So far so good.

Outside in the backyard the Roma tomato plants are starting to get there. The other generic tomato plant that I have is also finally starting to produce some fruit. It looks like this weekend will be another sauce-making weekend.

More on all this later.

Wednesday, September 29, 2010

Lemon Pancakes


Sunday is egg day. We always have eggs for breakfast on Sunday. But as we approached this last Sunday I noticed that we only had three eggs left. One short of our usual pair of two-egg omelettes. What to do?!? 

 I remembered a memorable breakfast that was served to us when we spent a weekend at our friend's house near Chicago. They made us a wonderful pancake breakfast one morning. We're normally not big pancake fans but these were unique, fluffy, and flavorful. Fortunately, I got the recipe and it called for three eggs. A plan was falling into place! A Saturday afternoon trip to the store provided any missing ingredients. 

  Lemon Pancakes 

Ingredients:
  • 3 eggs, separated
  • 1/4 cup all-purpose flour
  • 3/4 cup cottage cheese
  • 1/2 stick melted butter
  • 2 tablespoons sugar
  • 1/4 teaspoon salt
  • 1 tablespoon lemon zest (just do the zest of 1 small to medium lemon)
  • raspberry or maple syrup
Preparation:
  • Preheat the oven to 250 degrees
  • Separate the eggs into two bowls
  • Beat the egg whites until they hold stiff peaks
  • Add flour, cottage cheese, butter, sugar, salt, and lemon zest to the egg yolks
  • Beat the mixture until well mixed
  • With a large spatula, fold the egg whites into the yolk mixture
  • Stir until they are well mixed with no clumps of white or yellow
  • Heat a griddle or skillet over medium heat
  • Grease lightly and spoon 2-3 tablespoons of batter for each pancake
  • Cook slowly for about 90 seconds to two minutes and then flip and cook on the other side for 60 seconds
  • Keep the pancakes warm in the oven until ready to serve
Serve with warmed raspberry or maple syrup and powdered sugar on top. The original recipe calls for some berries on top of the pancakes. I added a ripe banana this time just because it needed to be eaten. Any good fruit will work. Use what you have on hand. It will all be good. Oh, and those are Morningstar veggie sausages.

Tuesday, September 21, 2010

Roasted Pear with Fig Jam and Goat Cheese with Port

The latest Vegetarian Times magazine had a series of recipes all based around pears. The article opens up with an excellent quote from Ralph Waldo Emerson:

There are only 10 minutes in the life of a pear when it is perfect to eat.

So true. When we get pears, it's too easy to think that they will last the way an apple or an orange will. But then you bite into a "mealy mouthful of overripe pear" and you realize you should have used that pear earlier.


Lately, I've been getting better with the pair of pears that have been in our box for the last few weeks. I dice one up in the morning, pour some vanilla yogurt on top, and take it as a part of my lunch. The yogurt and pear combo is a good one in my book.


The VT spread had an intriguing recipe for Roasted Pear Salad with Chevre and Fig Vinaigrette. I made it fairly close to the original using Maiche instead of watercress or arugula. While quite good, we thought the roasted pear was good enough on its own that it didn't need to be a salad. It made a perfectly good, palette-cleansing last course. A variation of the fruit/cheese course. The fig and the pear complement each other quite well. And the cheese gives it a bit of creaminess. More importantly, it makes the perfect course with which to enjoy a glass of quality port. This will show you that a pear should never go to waste.


Roasted Pear with Fig Jam and Goat Cheese (with Port)


  • 1-2 pears, halved and cored
  • fig jam (I found fig jam at Whole Foods in the jelly/jam part of the store. But over in the cheese section they were selling a jar of "Organic Adriatic Fig Spread" which I opted to get. Both were equally expensive.
  • goat cheese, sliced
  • olive oil
Directions:
  • Preheat oven to 375 degrees
  • Place pear halves cut side up
  • Spoon 1 teaspoon jam in the center of each pear half
  • Top with goat cheese
  • Lightly drizzle with oil
  • Bake pears for 30 minutes, or until cheese begins to brown
Serve warm with a glass of port and enjoy!

There's also room to add your own variations. Maybe some roasted nuts with a touch of honey sprinkled over the top might add another dimension. A stronger cheese like blue cheese would also be interesting. Just put "roasted pears" into Google and see the possibilities.

Thursday, September 9, 2010

Peach Clafoutis


Everyone's clafoutis is a little different.

A clafoutis is traditional french dessert and a great way to use up that summer fruit. It is quick and easy to make. The ingredients are simple and not overly unhealthy for you. It lies somewhere between a pancake and a custard. It's not sweet and sugary like a pie. Instead, it has an old world simplicity that takes you back to a time before mega-sweet desserts were the norm. Traditionally, it was made with cherries but you can also make it with berries, plums, sliced peaches, nectarines or apricots when in season.

I've made two in the last two weeks in an effort to use up our backyard peaches. The first one was just straight peaches. Then, the following week, I made it again but also added blueberries. I knew that the addition of blueberries would make look more attractive (and add another dimension in taste).

There are plenty of recipes online (I've included some below). You'll find variations in the amount of some of the key ingredients but it's easy enough to make you can fine tune it to your palate.

Here's where I started but it may evolve.

Ingredients:
  • 1/4 cup sugar
  • 2/3 cup all-purpose flour
  • 1/4 teaspoon salt
  • 3 eggs
  • 1 cup milk
  • 1 1/2 teaspoons vanilla extract
  • 4-6 peaches
  • 2 tablespoons powdered sugar

Directions:

  • Preheat oven to 375°F.
  • With a kitchen blender or a hand mixer, whisk together sugar, flour and salt in a medium bowl. Whisk in eggs one at a time. Whisk in milk and vanilla, just until incorporated.
  • Slice the peaches into 8ths. Peel them as you cut them (You can also drop whole peaches in boiling water for one minute and then transfer to an ice bath. The skins come right off then). But the peaches in my backyard were easy enough to peel as I sliced them.
  • Butter a 9 inch pie dish and pour just enough batter so as to cover the bottom of the dish.
  • Artfully arrange the peach slices evenly on the bottom of the dish. Pour the remaining batter over peaches.
  • Bake at 375 for 10 minutes. Then lower the heat to 350 and cook until it puffed and brown. A fork should come out clean in the center, 45 to 60 minutes,
  • Sift powdered sugar over top and cut into wedges.
The first time we just enjoyed it as is. The second time we we enjoyed it with a little high quality vanilla ice cream on the side.

Here are some sites where you can find more variations:

This site uses a little heavy cream in the batter.

This site adds the heavy cream and then amaretto which sounds yummy.

This site says it's Julia Childs recipe who adds a little cardamon.

Cooking with Amy also says it's Julia's but it's different from the last one.

This one uses brown sugar instead.

This one adds a little meyer zest which sounds interesting.

Have fun!

Sunday, September 5, 2010

Drunken Peaches

My peach tree had a great crop this year. But peaches don't have a great shelf life so I needed to find some ways to use them up. However, I found that most recipes for peaches either call for a stick of butter or 3 cups of sugar--something I would like to avoid. I found peach pie, peach crisp but what I wanted was a simple way to prepare the peaches. Ultimately, I found a handful of recipes that weren't sugar or butter laden and I'm trying to make one each night until I run out of peaches.

I know I need to learn how to can peaches but that will come at a later time.

In my research, I found an intriguing recipe on the Food Network for Peaches and Sauternes. I went to the dessert wine section of my local supermarket but I couldn't find any Sauternes. I ended picking up a Riesling dessert wine instead. I assumed any dessert white wine will work but I would like to come back and see if the Sauternes makes a difference. For now I'll call it:

Drunken Peaches

Ingredients
  • 6 to 8 peaches
  • 3 tablespoons sugar
  • 1 375 ml. bottle good dessert white wine
  • 1 tablespoon orange-flavored liqueur (recommended: Grand Marnier)

Directions
  • Bring a pot of water to a boil
  • Meanwhile, pour the wine and liqueur in a large bowl, add the sugar, and stir to dissolve
  • When the water is boiling, immerse the peaches in the water for 1 to 2 minutes.
  • Remove them with a slotted spoon and place them in a bowl of cold water and ice cubes to stop the cooking.
  • Peel the peaches and then slice them in wedges off the pit and into the bowl.
  • Cover and refrigerate for at least 2 hours, or overnight. Serve cool but not cold.

Monday, August 30, 2010

How to Season Cast Iron BBQ Cooking Grates

My approach to barbecue maintenance has been pretty low-key in the past. Pre-heat it and take a steel brush to it to remove the residues from the last meal. However, I noticed that the cast iron grates on my two year old barbecue were already starting to rust and the metal was coming apart. I have to admit that I didn't do much beyond setting it up before I started cooking on it. Now I know that's because I didn't season the grills (or do any maintenance) so they only lasted a short time. So I found a replacement set online and then did some research on how to better maintain them. Here's what I found.

Cast iron barbecue grates, just like cast iron skillets, need to be seasoned and maintained. I found a number of websites that offered tips on seasoning barbecue grates. After doing the research, this is what I did:

Clean:
Prior to first use, wash the grates thoroughly with a mild dishwashing liquid to remove the protective wax coating usually applied by most manufacturers to protect the iron during shipping. Rinse the grates in hot water and dry completely with a soft lint-free cloth or towel.


Season:
Pre-heat your oven to 300 degrees. Spread a thin coating of vegetable shortening over the entire surface of the grate (top, bottom, corners, sides) with a clean cotton rag that you don't mind throwing away when your done. Some people said olive oil or other oils would work but the Weber site specifically recommends:
A solid vegetable shortening is recommended for the initial seasoning. Spread a thin coating of solid vegetable shortening over the entire surface, including all corners, with a paper towel. Do not use salted fats such as butter or margarine
I started with paper towels as recommended but I quickly found that they began to shred and leave bits of paper behind. So I used part of an old cotton t-shirt that was in the rag pile. I also did my application outside and put about 4 sheets of newspaper down which was a good move.


Cover the oven shelves with foil and place the greased grates in the oven for 2 hours. After, turn off the oven and let the grates remain in the oven until cool. Repeat after grates are cool.

Once they cool for the second time, they are ready for use.

Maintenance:
To maintain them, you should re-season them regularly.
The Weber web site says:
To prevent rusting, they should be re-seasoned frequently, particularly when new. If rust occurs, clean with a steel brush. Reapply vegetable shortening and heat as indicated above.
Before putting the barbecue away for the winter, grease the grates very lightly with vegetable shortening, then wipe dry with a lint-free towel, wrap tightly in plastic wrap, and store them in a dry place.

The Weber website does validate one of my practices:
Don't do a burn-off after you grill, but rather leave the cooking residues on the grates/griddle to keep a protective coating on the cast iron. Then do a burn-off just before you grill. Brush off charred residues with a steel brush rather than a brass brush.
Those "cooking residues" on most barbecues are going to consist of animal fat which is a great product for the cast iron. But, in this household, there's going to little to no meat cooked on the barbecue. So, perhaps, more frequent seasoning will be required.

Here's how it looked after seasoning.

Monday, August 23, 2010

Got Peaches?


Farm Fresh to You posted a link to a collection of peach recipes from the New York Times.

Hopefully, this link will stand the test of time.

The peaches in my backyard are getting close to being ripe.

Sunday, August 22, 2010

Curried Butternut Squash and Carrot Bisque


The beauty of butternut squash is that it will last a long time. I simply store it in the pantry away from light and where it's fairly cool. I had a number of squash tucked away in the pantry from a number of months ago (more months than I want to admit!).

Last week's box brought some absolutely gorgeous carrots. The greens were incredible. So incredibly green and vibrant that I got online and researched whether they were edible. Turns out they are but it was more than I wanted to explore at the moment. If you want to find out more, click here.

So I decided to make a soup that I had made once before from Bon Appetit magazine. I figured I would stick it in the freezer for when it gets colder (even though it's almost been "soup weather" here in August!). The soup is an interesting contrast. The apple and honey give it a bit of sweetness while the Thai curry seasoning gives it a bit of a kick that warms you up when it's cold outside.


While making this soup I decided that it was high time to replace my hand immersion blender. A few years back I got a Breville from one of those high-end home magazines. It was cordless which I thought would be a plus. From the start it was annoying. There was a safety button that you had to press down for 1 second before you had to press down (with another finger) the start button. After a few months it also stopped working continuously. Every five seconds it would die and you had to start all over.
I had my eye on this one from Amazon and then I saw it for a better price during a sale at my local Macy's. I have not yet put the new one through the paces but the initial tinkering told me that there was a lot more power. I will gladly give up the cordless features for power and reliability.

Curried Butternut Squash and Carrot Bisque
  • 2 medium butternut squash, halved lengthwise and seeded
  • Olive oil
  • 2 Tbsp. butter
  • 1 small to medium yellow onion, chopped
  • 3-4 carrots, peeled and chopped
  • 1 apple, peeled, seeded, and chopped
  • 32 oz. broth
  • 1/4 cup half and half
  • 2 bay leaves
  • 1/2 tsp. (spicy) to 1 tsp. (very spicy) Thai Red Curry paste
  • 2 tsp. honey
Preparation
  • Preheat oven to 375 degrees
  • Brush cut side of squash with olive oil and place on a baking dish
  • Roast squash until tender, about 1 hour, and let cool
  • Melt butter in a large pot over medium heat
  • Add onions and saute for 1-2 minutes
  • Add carrots and apple and saute for five minutes
  • Add Thai curry paste and stir until the paste is mixed in well with other ingredients
  • Add broth, bay leaves, and squash to the pot and bring to a boil
  • Reduce heat to medium low simmer for 1 hour uncovered stirring regularly
  • Discard bay leaves
  • Puree soup in a blender or use an immersion mixer
  • Stir in half and half and honey
  • Season with salt and pepper as needed
Source: Bon Appetit http://www.bonappetit.com/recipes/2007/02/curried_butternut_squash_bisque

Saturday, August 14, 2010

Cherry Tomato Bruschetta


It's officially tomato season! The tomatoes in the box are starting to arrive. This week's box brought a pint of cherry tomatoes as well as some regular tomatoes. The fresh basil from this week and last needed to be used up so this recipe was an obvious one.

Bruschetta is a great way to enjoy fresh tomatoes and it's the perfect summer appetizer. So the pint of cherry tomatoes were used to make this recipe.


Cherry Tomato Bruschetta
  • 1 pint cherry tomatoes, finely chopped
  • sundried tomatoes, finely chopped (just about 2 tablespoons)
  • 2 large cloves of garlic, minced
  • lots of fresh basil leaves, chopped
  • 3 Tbsp. olive oil
  • 1 Tbsp. balsamic vinegar
  • generous grind of freshly ground black pepper
  • pinch of salt
Mix all ingredients in a bowl and stir to mix. Let it sit in the fridge for awhile to marry the flavors. Let sit at room temperature for a bit prior to serving. Spoon the mixture onto baguette or bread slices which can be toasted or not. Enjoy with some white wine on a hot afternoon.

Monday, August 9, 2010

Baba Ganouj


One of the items in the box this week was a solitary, purple eggplant. I like eggplant but it's not the easiest item in the world to cook--or cook right. Eggplant can be elusive. It can be bitter, mushy, and tasteless. At the same time, done right, it can be silky and satisfying.

So I did some research, determined to use this eggplant in the best possible way. I settled on Baba Ganouj (spelled a variety of ways). I was drawn to a Cook's Illustrated recipe because it talked about how grilling eggplant on the BBQ drew out flavors that the oven cannot. I must agree. Grilling the eggplant over an open flame imparts a subtle, smoky flavor. I used a gas grill and from what I read hot coals may even improve this recipe. The other ingredients are simple. For the tahini, I used Trader Joe's Tahini Sauce mostly because I wanted to avoid the supermarket.

Most recipes call for two eggplants. The recipe below is my version for just one.


Baba Ganouj:
  • 1 medium globe eggplant
  • 1-2 cloves garlic
  • 2 tsp. lemon juice
  • 1 tbsp. tahini
  • 1/2 tbsp. olive oil
  • 1/2 tsp. salt
  • 2 tsp. chopped parsley leaves
  • pepper
  • paprika
Preparation:
  1. Preheat grill - I got it up to around 400 degrees
  2. Puncture the eggplant multiple times with a fork to prevent an "eggsplosion"
  3. Place eggplant directly on the grill grate turning occasionally for 20-30 minutes (I went for 30 minutes. The eggplant should be pretty sad looking and have some give as you press the back of a fork to it)
  4. Optional: I placed the garlic cloves in an envelope of foil and put in on the grill for about 15 minutes
  5. As eggplant cooks, prepare other ingredients
  6. When eggplant is done, remove from heat and let it rest for 10-20 minutes until it can be handled
  7. Using a fork, pull away the peel in strips
  8. Add the roasted eggplant to the food processor along with the other ingredients
  9. Mix until at desired consistency
  10. To present, drizzle some olive oil on top, sprinkle with paprika, and garnish with parsley leaves
  11. Serve with toasted baguettes or pita bread
Inspiration:

Cook's Illustrated "Perfect Vegetables"

Alton Brown's recipe:
http://www.foodnetwork.com/recipes/alton-brown/baba-ghannouj-recipe/index.html

Eating Well Magazine:
http://www.eatingwell.com/recipes/baba_ganouj.html

Friday, August 6, 2010

Food Images from the Azores

We spent the last few weeks exploring the Azores. Here are some shots I took there.


Saturday, July 10, 2010

Grilled Summer Squash


We've received a healthy dose of summer squash for the last two weeks in our CSA box. Thankfully, we opted not to plant zucchini in the backyard this year. So we are not swimming in squash as we have in years past.

But squash season and grilling season are the perfect combination. Grilling the mild squash on that outdoor BBQ gives it a flavor and texture that you can't get from the skillet. You can also keep it fairly simple (and low cal) by just using some olive oil and herbs. It's the perfect side dish to serve along whatever else you may have on the grill.

  1. Pre-heat the grill to medium high heat
  2. Slice off the tops and bottoms of the squash and then slice into uniform slices - about a 1/4" is ideal
  3. Toss in a bowl with some olive oil, pinch of salt, black pepper and whatever dried herbs you want (oregano, basil, thyme, garlic or onion powder, or your favorite combo or seasoning mix). It's best to let this sit for a while to let the flavors get into the squash
  4. Place slices directly on the grill for about 3-4 minutes on each side - the grill marks make it more interesting
At this point, you can serve as is but you can also take it up a notch by topping the grilled squash with a little something extra that will greatly enhance the flavor. Adding this after the grilling ensures that whatever flavors you add are not lost on the grill. My favorite is a generous sprinkle of Penzey's Fox Point seasoning. In fact, that is the perfect seasoning for all vegetables whether grilled or steamed. Fox Point is a blend of seasonings that does a great job "brightening" the flavor of vegetables. I love it!

But you can also look online for other ideas for that post-grill flavor addition:
Squash has a lot of water in it so it will cool quickly. So it's best to serve immediately.

Thursday, July 1, 2010

Grilled Leg of Lamb


I know, I advertise myself as a pescetarian. So why is there a recipe for grilled lamb here? Well, we had a dinner party and the theme was spring and you can't get anymore "spring-y" than a leg of lamb. Plus, these guests were carnivores. A spring vegetable risotto was also served for those who wanted to avoid meat.

We remembered an old recipe that we used to make back when we ate meat. It was from the Los Angeles Times and I recalled many of the ingredients. But we culled all the meat recipes from our notebooks long ago. So I did some research online and found this recipe that approximates what I remembered.

The recipe (and the photo) come from the Cooking San Francisco food blog (and they acknowledge that the recipe originally comes from The New Basics Cookbook). It's easy to make and quite tasty (if you eat meat). And, yes, I did eat the lamb that night.

Marinated Grilled Leg of Lamb
  • 1 4-5 lb. boneless leg of lamb (ask the butcher to butterfly it so that it can lay flat)
  • 1 cup dry red wine
  • 3/4 cup soy sauce
  • 2 tablespoons of olive oil
  • 4 large garlic cloves, crushed
  • 1/2 cup mint leaves
  • 2 tablespoons rosemary leaves, slightly bruised
  • 1 tablespoon freshly ground black pepper

  1. Combine the wine, soy sauce, garlic, mint, rosemary, and pepper in a 9x13 inch glass baking dish. Mix well. Place the lamb in the dish turning it over a few times so that the marinade covers all sides. Cover with plastic wrap and refrigerate for at least 6 hours (I did it overnight). Turn the lamb frequently.
  2. Remove the lamb from the refrigerator and let it sit at room temperature for 1 hour before grilling. Prepare grill on high heat.
  3. Remove lamb from dish and let the excess liquid drain off. Keep the marinade.
  4. Grill lamb over medium high heat (around 450 degrees). Baste frequently with the marinade. The internal temperature of the lamb should be 145 degrees for medium-rare.
  5. Cut the lamb into very thin slices and serve.

Wednesday, June 23, 2010

Mundial Cutlery, Part 2


An earlier post, made reference to a magazine review for a 10" chef's knife for under $20. I finally ordered my own and it arrived a few weeks ago and I am quite happy with the product.

I have been using an 8" Henckels for the last few years. So this 10" almost felt like a murder weapon. But after a few uses I found it to be comfortable, balanced, and I felt in control of the knife.

I ordered the knife from Mad Cow Cutlery and I think I found them in a random Google search. Their price was an incredible $17 and the service was outstanding. USPS lost the first knife and Mad Cow quickly sent another one for free which arrived a few days later.

This will be my second Mundial knife purchase. Earlier this year I picked up a bread knife for an amazing $11.

Here's a video to look at on proper knife technique:
http://www.youtube.com/watch?v=7sSSfoor6RY

Friday, May 21, 2010

Tofu Yu Burrito Mix

We recently visited the new Whole Foods store just off Lake Merritt in Oakland. It's a nice roomy store where you make a circular trip through the store and visit the various sections. Only a small fraction of the store is laid out in the traditional aisle format. Most of it fits the new model of the supermarket.

We picked up a new brand of baked, flavored tofu that we were not familiar with. It was billed as a jalapeno smoked tofu. The company was Tofu-Yu and it's located right here in the Bay Area. Visit their web site and you'll find that it's a new company looking specialize in gourmet tofu. They sell at various farmer's markets and are trying to get into the distribution channels of local stores.


This tofu is quite good and "meaty" in texture. The seasonings are bold which is a good thing with tofu. The outer, browned coating tends to separate but the flavors permeate deeply.

I made a burrito mix containing:
  • 1 8 oz. package of jalapeno smoked tofu, diced
  • small yellow onion, diced
  • 1/2 can of red kidney beans
  • 3/4 can of corn kernels
  • garlic
  • seasoning - use what you have. I used some seasoning from a Rancho La Puerta mix
  • grated cheese
  • thinly sliced romaine lettuce (from the backyard!)
  • Salt and pepper to taste
  • fresh tortillas - Trader Joe's Truly Handmade Tortillas are what we used
  • your favorite salsa - currently on a tomatillo salsa kick

Good tofu that we'll have to look for in the future.

Friday, May 7, 2010

Roasted Carrots


It seemed that Nantes carrots were arriving every week. We try to add some diced or sliced carrots to the salad each evening (along with the yummy radishes!) but sometimes we feel like there are more carrots than we can use.

Such are the times to remember the beauty of roasted vegetables. This week's carrots got roasted as a side instead of raw in the salad. This was the second batch of roasted carrots. Last week's carrots got peeled but were left whole. This week's carrots were just cleaned and cut into 1 inch slices. Both were good.
Roasting vegetables is so simple yet it brings out so many complex flavors. Carrots, asparagus, parsnips, potatoes, onions are all excellent candidates. Alice Waters, as usual, provides the best guidance:

Cook the vegetables in a hot oven preheated to 400 degrees. A lower temperature will dry out the vegetables while they cook, making them leathery before they are done; a higher temperature will burn them before they are cooked all the way through. Stir the vegetables a few times while they are cooking, turning those along the edges into the center. Cook them until they are tender and nicely browned here and there. Don't let them get too far: a little browning makes them sweeter, but if you let them get too dark they will taste bitter.
When the vegetables are done you can also add some fresh herbs. With carrots, thyme is a good choice.

Saturday, May 1, 2010

Mundial Cutlery


It was a little over twenty years ago that we got a Chicago Cutlery knife set for our wedding shower. Complete with walnut handles (which I dutifully oil every few years), they have served us well. One boning knife fell into the running disposal a few years ago which chipped up the handle and blade but, other than that, they have been good. But after twenty years of daily use, I found myself wondering how long should a good knife last? And what's the best way to maintain a sharp knife (more on this later).

A few months ago, I was talking to a friend and we both had read this review of a $20 chef's knife in Bon Appetit. He got one for Christmas and has found it to be a great knife. I plan on ordering one myself and found it online for under $20 at Mad Cow Cutlery.

A few weeks ago, another friend brought over some homemade bread. He pulled out the trusty Chicago Cutlery bread knife and made some unsuccessful attempts to slice the bread. "You need a new bread knife!" he told me. We scoured around to try to find something else that could work.

Later, I wondered if Mundial also made bread knives. After some online research I found that not only did they make a serrated bread knife but that it came with a price tag of just $10! There is one now resting in the slot where the Chicago Cutlery bread knife used to reside. So far, it's a great buy. It's quite sharp and I did a few side-by-side tests with the old knife and the difference is day and night.

Monday, April 26, 2010

In the Garden: April 2010


I was able to get a head start this last weekend by planting a fair amount of the vegetables in the raised beds. It was a beautiful sunny weekend that had lots of us at the nursery. The selection at the nursery was still somewhat limited.

There are a few empty spots in the beds still for new things. But I am a month ahead of where I was last year. Of the six romaine lettuce plants I planted in November, two are still going. They are getting a bit tough so if I pull those up there will be even more room.

So far:
  • Tomato - Two Roma and one Brandywine.
  • Basil - Six plants. Two less than last year so I may plant a few more in pots.
  • Lettuce - I liked the Red Sails that I planted last year so I bought a six-pack again.
  • Broccoli - Nothing better than fresh broccoli.
  • Strawberries - I have one in the ground and two pots with three each. I am concerned that the squirrels will get them but I thought it was worth a shot.
  • Soy Beans or Edamame - First time attempt on these. Not sure what to expect. This site offers some growing tips.
  • Herbs - Last year I planted a bunch of parsley in the bed and it was too much for the two of us. This year I opted to use a pot we picked up at the Alameda Antique Fair and plant a mix of parsley, oregano, and chives. I left room for thyme which was not in stock at the nursery. This herb pot will sit out on the back porch where I can easily access it whenever I want to add some fresh herbs to a recipe.

Saturday, March 27, 2010

Spring has Sprung

Apple blossoms, peach tree in full bloom, and baby apricots.