Sunday, December 27, 2020

Mustard Roasted Salmon with Lingonberry Sauce

 I was digging around the back of the fridge and discovered a jar of lingonberry preserves. The reason I even have a jar of lingonberry preserves is due to the fact that the recipe below was my go to salmon recipe for quite awhile. It was adapted from a recipe I saw in Bon Appetit magazine. It is a festive (yet easy) dish that I have served for company on more than one occasion. In fact, some close friends we made this for created their alternative to this dish by using chipotle raspberry sauce in lieu of the lingonberry.

Upon finding the jar, I did a quick check to make sure I had the other ingredients on hand. I did so I decided to bring this back and serve it for dinner recently. It was like pulling out that record/CD that you used to listen to all the time but haven't for many years. I was surprised that I hadn't already posted it here. 

You may or may not be able to find lingonberry preserves at your supermarket. It can be ordered via Amazon. 

Lingonberry jam is a very popular condiment in the Scandanavian countries. Because of that, you may very find a jar at your local Ikea store.

A hearty side of roasted potatoes or a saute of leafy greens are two good choices for a side dish.


Mustard Roasted Salmon with Lingonberry Sauce

Ingredients:

  • Dijon mustard - 1 Tbsp.
  • Butter - 2 Tbsp (divided)
  • Salmon fillets - 2
  • Shallots - 1 medium, peeled and finely chopped
  • Lingonberry preserves - 2 Tbsp.
  • Raspberry vinegar - 2 Tbsp. 
Directions:
  • Preheat oven to 450 degrees.
  • In a small prep bowl, melt 1 Tbsp. butter and add mustard. Stir until well combined.
  • Oil a Pyrex baking dish and place salmon fillets skin side down. Sprinkle lightly with salt. 
  • Spoon mustard/butter mixture over the top of the salmon and spread it out across the whole fillet.
    Season generously with freshly cracked black pepper. Place in the oven for 15 minutes until mustard starts to brown (start monitoring at 11 or 12 minutes)--Fish may need a bit of browning under the broiler at the end (optional).
  • As salmon cooks, heat remaining tablespoon of butter in a smaller saucepan over medium heat. Add chopped shallots and saute for a few minutes until slightly softened.
  • Add the lingonberry preserves and the raspberry vinegar and stir until mixture is smooth. Remove from heat. 
  • When the fish is cooked, remove from oven and let cool for a few
    minutes. Plate and spoon lingonberry sauce over the top and spread it across the entire fillet.


Wednesday, November 11, 2020

Cheddar and Jalapeño Sourdough

 I had planned on learning how to bake bread once I was retired but COVID-19 changed all that. At the start off the stay-at-home order, a friend reached out and asked me if I was interested in some sourdough starter. He assured me that baking bread was not that hard and that he would share a beginner's no-knead recipe and some YouTube videos. We even had a Zoom session one evening as he was prepping the ingredients. 

A few days later, he dropped off a small baggie of sourdough starter and I followed his directions on getting it established in my quart Bell jar. About 3 days later I had a 3/4 full jar of ripe, bubbly starter. 

My first number of loaves turned out quite well. I gave most of them away to neighbors and friends. Once I got the hang of it, I did have a few less than stellar loaves until I figured out that I was letting the bulk ferment go too long. Once I got back into following the time parameters, the bread was back on track. 

I won't go into the step-by-step of making the sourdough (just follow the link above) but I will say that once I had the basics down, I ready to branch out. At first I was thinking about an olive loaf but I wondered how much olives to add. Was a certain type of olive better than others? When do you add it in? So I got online a did some research. I found this website and once I saw the cheddar and jalapeño bread I knew that was the one I wanted to try first.  

This bread is intoxicating and no butter is needed when eating a slice. The smell of baking bread is already wonderful but the addition of cheese and jalapeños puts it over the top.

Cheddar and Jalapeño Sourdough

Ingredients:

  • Ingredients for sourdough bread
  • Cheddar cheese (sharp preferred) - slightly heaping 1/2 cup cubed
  • Jarred pickled jalapeños - heaping 1/3 cup coarsely chopped
Directions:
  • Prepare sourdough as usual
  • Add the cheese and jalapeños just after the initial mix of ingredients

Sunday, October 11, 2020

Egg Salad with Capers, Dill, and Lemon

The eggs salad sandwich brings back childhood memories. If you grew up in the 60s, this was probably part of your school lunch or a simple dinner from time to time. Likely served on Wonder bread to boot. Although every mother may have had her twist on the recipe, I am certain all of our childhood egg salads were more alike than unique. The allure of egg salad continues to this day. If you search of egg salad on the internet, you will find that nearly every one of them has the word "classic" in the title as if it would be unheard of the vary egg salad or try something new. 

I have a few paper notebooks where I tape recipes from magazines or newspapers that look interesting to me. I was looking through them trying to find some simple meals I could make for a friend going through chemo and radiation. This recipe caught my eye and I decided to give it a trial run. 

While waiting for the eggs to cool after hard boiling them, I was trying to decide how to chop the eggs. The recipe suggested using a potato masher but I don't have one of those. So I decided to use the wooden bowl and knife set I got as a Christmas present. The set is from Holland Bowl Mill out of Holland, Michigan and they make high quality wooden bowls and they also have the Mezzaluna knife. The bowl features the chopping knife designed to work right in the bowl. The idea is that you can chop your green salad right in the salad bowl. In addition to salads, it turned out to that the bowl and the scalloped knife was the perfect way to chop the eggs. 

This recipe still has a lot of same ingredients as the classic egg salad but it does have some new twists.

Egg Salad with Capers, Dill, and Lemon

Ingredients:

  • Mayonnaise - 1/2 cup
  • Capers - 4 tbsp. rinsed and chopped
  • Dijon mustard - 4 tsp.
  • Dill - 4 tsp. fresh chopped
  • Lemon zest - from 1 medium to large lemon
  • Eggs - 8 hard cooked, peeled and chopped
  • Radishes - 2-4 thinly sliced
  • Romaine lettuce leaves - 4 washed, dried, and cut to fit
  • Buns - 4 high quality buns (ciabatta, brioche, etc.)
  • Salt - start with a generous pinch 
  • Black pepper - 1/2 tsp. 
Instructions:
  • Hard boil eggs and let cool.
  • In a medium bowl whisk together mayonnaise, capers, mustard, dill, and lemon zest.
  • In a separate bowl, coarsely chop eggs.
  • Thinly slice radishes.
  • Add chopped eggs to mayonnaise mixture and stir to mix. Add black pepper and salt to taste. 
  • Cut buns in half and place cut side up on a cookie sheet. Broil in an oven until lightly toasted. 
  • Spread some egg salad mixture on the bottom layer bun. Top with sliced radishes and lettuce. Top with more egg salad and add the top bun.
  • Serves 4


Thursday, June 25, 2020

Pan Seared Halibut with Lemon/Caper Sauce

Most every week we get some fresh salmon from our local Farmer's Market. There's one stand that just sells fish and seafood. Recently, with shelter-in-place, we've been trying to venture out and get a second fish. We've tried sole, cod, and halibut. The halibut was the best surprise. Yes, I've had it before but it's been awhile and, when I've had it, it's been in restaurants. The surprise came from the fact that halibut is so meaty. It's meatier than chicken. It approaches pork or turkey in terms of density.

Halibut is not cheap but you don't need as much due to the meatiness. You can fill in the smaller fish portion with your sides/salads.

Once I got the halibut, I searched online for various ways to prepare it. I started with this excellent recipe and it was an instant hit in our house. We love capers and we have a lemon tree in the backyard. But when I went to make it a second time, I knew that I needed to adapt the recipe for two people.

The best pan to use for this is a carbon steel pan. You can get it pretty hot and it will brown the fish nicely. If you don't have one, you can also use cast iron or an enameled iron skillet (like Le Creuset). A traditional non-stick with work if that's all you have.

It's important to have the skin removed. If you buy from a fish market, ask them to skin it for you. Skinning halibut at home is not easy. It's best left to a professional.

However, if your halibut still has skin on one side, there is a work around. In Step 2, put the skin side down first and cook as directed. Once you flip the fish, you should be able to easily pull the skin off. You can flip the fish again to get some color and the side with the removed skin. 

Pan-Seared Halibut with Lemon/Caper Sauce 

Ingredients:

  • 1/2 lb. (or slightly more) fresh halibut, skinned
  • 2 tbsp. butter, divided
  • 2 cloves garlic, minced
  • 1 tbsp. lemon juice
  • 1 tbsp. capers, rinsed
  • small handful flat leaf parsley, chopped
  • 1/4 cup white wine
  • 1-2 tbsp. olive oil
  • Kosher salt
  • Freshly ground black pepper
  • 2 lemon slices, as garnish

Pan Seared Halibut with Lemon Caper Sauce

Directions:

  1. Rinse and dry the halibut fillet and cut into two portions. Sprinkle some salt over the top.
  2. Place 1 tablespoon of butter along with some olive oil in a skillet over medium high heat. Swirl the butter around. Once fully melted and hot, add the fish, salted side down and set a timer for 5 minutes. Leave the fish untouched. Sprinkle the other side of fish with a little salt.
  3. Once time is up, carefully turn over the fish and set the timer for another 5 minutes.
  4. Add the two lemon slices to the pan to cook along with the fish. 
  5. When time is up, use a spatula to remove the fillets to a dinner plate. Retrieve the lemon slices and place them on top of the fillets.
  6. Lower heat to medium and add the minced garlic and cook for about 1 minute, stirring constantly.
  7. Add the wine and cook to evaporate for a few minutes. Add the lemon juice, capers, and parsley and stir to mix.
  8. Add the final tablespoon of butter to melt and stir to mix with all of the other ingredients. Use a spatula, to add the fish back to the skillet. Spoon some sauce over the top of the fish.
  9. Remove fillets and plate on dinner plates. Spoon a little sauce over the top.
  10. Optional: You will have leftover skillet sauce. If you are doing a side or rice, grains, or roasted vegetables, you can also add some of the lemon/caper sauce to the side dishes to tie everything together. 
Serves 2

Sunday, May 10, 2020

How to Get Fava Beans Out of the Pod

Right now is one of our favorite times of the year: fava bean season.

Whenever we find fava beans at the Farmer's Market we buy a big bag. When buying fava beans, you should figure about a pound per person. That may seem like a lot but a good portion ends up in the compost bin.

I suspect that some people may be put off by fava beans because of the amount of work it takes. I have to agree with that objection on a certain level. I've already described how time consuming it is to prep fava beans.

Frozen fava beans can be found but it's not really the same as fresh. Depending on what you're making, frozen fava beans can be an option. But fresh fava beans,  simply prepared, cannot be beaten.

So the first step with fava beans is to remove the beans from the pod. If you look this up online, most websites will talk about pulling down the fibrous seam from the stem to the end (sometimes called "pulling down the zipper"). Online all of this easy and painless but in reality it doesn't always work so seamlessly. You end up still peeling some parts of the bean and putting in some hard work.

I used to do it that way until a coworker introduced me to a new way to do the first step in processing fava beans. It significantly cuts down the prep time. So let me introduce this new method to you. But, like learning to play an instrument, it will take some practice to master. But once you get it down, the overall prep time will be greatly reduced.

Let's dive in:

How to Get Fava Beans Out of the Pod


  1. Pick up a fava bean and work from end to the other.
  2. Locate the first bean in the pod with your fingers. 
  3. Place your two thumbs on the bean in the pod. One entire side of the bean should be covered by your thumbs. The orientation is that your thumbs are closest to your body. The rest of your fingers are wrapped around the outside of the bean.
  4. Your index fingers should be just outside the top and bottom of the bean with most of the bean uncovered by your fingers on the opposite side.
  5. In one fluid motion, push out the bean with your thumbs into a small bowl. Be forewarned, sometimes the bean shoots out like a bullet. 
I prefer fava beans recipes that are simple. As Chef Linton Hopkins says in one of the links below, "I like fava beans (sauteed) with fresh olive oil, lemon, and sea salt--simple."

Recipes:


Sunday, May 3, 2020

Roasted Cauliflower with Toum

I recently discovered toum. So, how do I describe this delicious concoction. Toum is perhaps best described as a garlicky spread with the consistency of mayonnaise. It's sometimes called Lebanese Garlic Sauce because it's used in a variety of Lebanese dishes. Toum can be used as a spread on food, a dip for many things, or, in this recipe, a flavorful coating on roasted vegetables.

Toum is an ancient condiment that has been used in Middle Eastern cooking for centuries. It is a staple condiment that is ever-present in the Lebanese fridge like we would always have mustard or mayonnaise on hand.

I encountered toum while preparing for a dinner party. We had found an article in a Bon Appetit magazine that featured a traditional Lebanese dinner. The toum was part of a marinade for chicken skewers (for our carnivore friends). In Lebanon, the dish is called Shish Tawook or Shish Taouk. For the leftover toum, the recipe said to serve it in a small bowl as a dip for pita bread.

The recipe said the toum could be made a few days in advance and just kept in fridge. So I made my first batch a few day ahead and once I took my first taste of it after making it for the first time, I was sold. It was SO good.

I had plenty of leftover toum following the dinner party. So I began to find other uses for it and I discovered how versatile it is. I subbed out the mayo on a on fish sandwich (or cut it 1:1 with mayo to infuse a garlic supercharge to regular mayo). It also makes a tangy dip for crackers or veggies when snacking. But I think the real magic happens when you add it to roasted vegetables just before serving. Think roasted carrots, potatoes, parsnips, and my new favorite, cauliflower. Now cauliflower may not always be the most popular of the vegetables, but roasting cauliflower brings out a nutty flavor and the toum makes the perfect coating.

While doing some research on toum, I found that this version is not 100% authentic. The Lebanese don't use the egg whites. I tried to make it the traditional way a few times. The first attempt was a complete failure. The mixture "broke" and it ended up going down the disposal. I had better luck on my second attempt but it was then I realized that this version is "no fail" version due to the addition of the egg whites. That means less waste and frustration on your first try.

Toum will keep in the fridge for several weeks.

Toum

Ingredients:
  • Garlic - 6-8 cloves 
  • Egg whites - 2 large
  • Lemon juice - 2-3 tablespoons
  • Neutral oil - 1 1/2 cup (Canola or vegetable oil is best)
Directions:
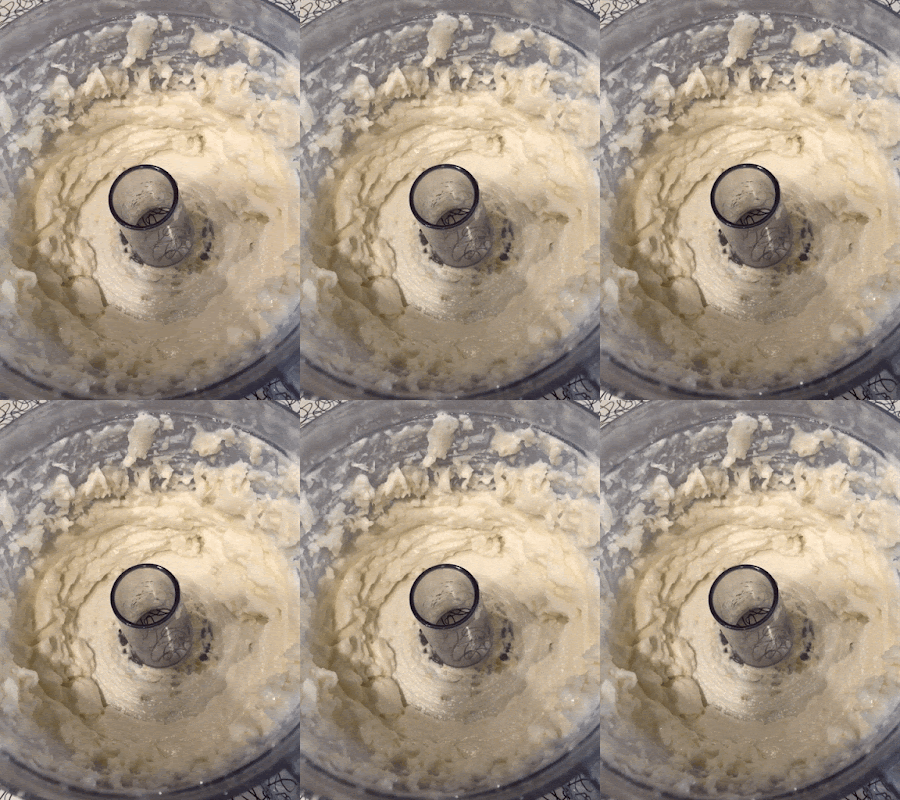
  • In a food processor, pulse garlic, egg whites, and lemon juice until a paste begins to form
  • Turn food processor on continuous and VERY SLOWLY drizzle in half of the oil (you want the thinnest stream of oil you can manage going into the processor--it should take several minutes)
  • Turn off processor and scrape down the sides of the bowl
  • Continue to VERY gradually add the rest of the oil with the processor on
  • Add some salt
  • Continue to run the processor until the mixture thickens and becomes light and airy 


Roasted Cauliflower with Toum

Ingredients:
  • Cauliflower - 1 large, cut into florets
  • Olive oil
  • Salt and pepper - to taste
  • Toum - 1 Tablespoon
Directions:
  • Pre-heat oven to 425 degrees
  • Cut cauliflower into florets and place in a large bowl
  • Drizzle oil over florets
  • Salt and pepper to taste
  • With a large spoon, mix the florets to evenly coat
  • Add more oil and salt and pepper if needed
  • Line a cookie sheet with parchment paper
  • Spread florets on sheet and spread around evenly and in one layer
  • Roast in the oven 25-30 minutes until there is some browning on the edges (toss and turn the florets about halfway through)
  • When done, remove from the oven and return florets to the large bowl
  • Add toum to the bowl and stir to coat
  • Serve immediately as a side
Resources:

Saturday, March 21, 2020

Seared Tilapia with Creamy Curry Sauce

This is my version of a recent Blue Apron meal that we had. It's an easy weeknight meal that only uses one pan and one skillet. We loved the mixture of textures and flavors. Tilapia is easy to find either fresh or frozen.

The toughest part may be finding the curry paste. I found a jar of Mae Ploy at my local Safeway that should last a decade. I also see it's available on Amazon (I want to also try the bottled yellow curry sauce at Trader Joe's).

UPDATE: I finally tried the TJ's Yellow curry sauce. By itself, it's just OK but I did two Tbsp. each of the TJ's Yellow curry sauce with Kraft Ranch dressing and it was pretty close. I think I prefer the Mae Ploy curry paste. But the TJ's sauce can be a fine substitute--just mix it with Ranch dressing. 

Tilapia is farmed in other countries but the Monterey Bay Aquarium's Seafood Watch website gives most tilapia a favorable rating.

Seared Tilapia with Creamy Curry Sauce

Ingredients:
Serves 2
This is what I found at my local supermarket.
  • Tilapia fillets - 2 
  • Baby bok choy - 2-4 depending on size
  • Jasmine or white rice - 1/2 cup
  • Garlic - 2 cloves
  • Rice flour - 1/4 cup
  • Curry powder - 1 Tbsp.
  • Ranch dressing - 3 Tbsp. 
  • Yellow curry paste - 1 tsp. 
  • Sesame oil - 1-2 Tbsp. 
  • Roasted peanuts - small handful
Directions:
You want a skillet full of bok choy.
  1. Wash and dry bok choy. Thinly slice discarding the root ends.
  2. Add 1 cup of water and a pinch of salt to a medium pot over high heat. Add the rice and bring to a boil. Once boiling, reduce heat to low, cover, and cook without stirring for 12 minutes. Turn off when done and fluff with a fork.
  3. Roughly chop garlic and peanuts separately. Set each aside in small prep bowls.
  4. Heat a medium skillet with some olive oil over medium heat. Add the bok choy and garlic then add some pepper. Cook, stirring frequently, until softened and leaves are wilted (about 2-3 minutes). When done, spoon the bok choy into a large bowl and cover to retain heat. 
  5. Add ranch dressing and yellow curry paste to a small bowl and whisk together with 1 teaspoon water. Set aside and let flavors marry.
  6. Place the curry powder and flour on a dinner plate and mix together with a salad fork. Dredge fish into the mixture until thoroughly coated on both sides. 
  7. Reheat same skillet over medium high heat with a little olive oil. Add the coated fish and cook 4-6 minutes per side until lightly browned and cooked through.
  8. Add the bok choy to the finished rice pan and stir to mix. Drizzle the sesame oil into the rice mixture and stir to coat. 
  9. Plate a bed of rice/bok choy mix, top with cooked tilapia, spoon the curry sauce across the top of the fish and rice mixture. Sprinkle chopped peanuts over the top.


Pair with a Sauvignon Blanc.

(Updated Feb. 2024)