Monday, December 14, 2009

Roasted Butternut Squash and Rapini Risotto


The last few deliveries have included a large bunch of rapini. This is another case where the box has introduced me to a new ingredient that I need to figure out how to cook.

Rapini is also called broccoli raab (or broccoli rabe). According to Wikipedia,
Rapini is classified scientifically as Brassica rapa subspecies rapa,in the same subspecies as the turnip.

Rapini has many spiked leaves that surround a green bud which looks very similar to a small head of broccoli. There may be small yellow flowers blooming from the buds, which are edible.

The flavor of rapini has been described as nutty, bitter, pungent, and "an acquired taste." The Italian cultivar is similar to, but much more bitter than the Chinese. The Chinese cultivar is of a lighter green color, not at all bitter or pungent, and more tender.

Rapini is a source of vitamins A, C, and K, as well as potassium, calcium, and iron.

Rapini is grown in California from August through March making it a great candidate for the fall garden. The informational insert that came with this week's box has you blanching the rapini for a few minutes in salted boiling water. Many of the recipes I found online confirmed this approach.

To blanch the rapini: Bring 3 quarts of water to a boil, Meanwhile, clean and cut the rapini leaves into 1 inch strips. When water begins to boil, add 2 teaspoons of salt and the greens. Stir until wilted and tender (1-2 minutes). Drain pot into colander. Fill the pot with cold water and submerge greens to stop cooking. Dry in a salad spinner.

So last night's dinner featured the blanched rapini and a roasted butternut squash (both from the box) going into a risotto. A few drops of truffle oil after plating made for a great meal on a cloudy, rainy day.

The blanched rapini is one approach but you can also explore some other strategies. Two recipes (one from Rachael Ray and another from Mariquita Farms) have you wilting the rapini in a skillet with broth or water along with the other ingredients. This local food blog makes a great case for roasting it which I look forward to trying.

Sunday, December 13, 2009

Eggnog Cheesecake

This was the second dessert I made for a recent dinner party. This photo (not mine) caught my eye in a Sunset magazine one year ago. Despite the attractive photo, I never made the recipe because I was missing a key ingredient: a springform pan. I managed to pick one up eventually but I never got around to making this recipe. Recently, I rediscovered the saved magazine on a shelf and decided to make it.

The original Sunset recipe is now at My Recipes and can be found here.

Ingredients:

  • 1 1/4 cups graham cracker crumbs
  • 3 tablespoons butter, melted
  • 3 pkgs. (8 oz. each) cream cheese, at room temperature
  • 1 cup sugar, divided (3/4 for cake; 1/4 for whipped cream)
  • 4 large eggs, at room temperature
  • 2 tablespoons all-purpose flour
  • 1/3 cup brandy
  • 2 teaspoons freshly grated nutmeg, divided
  • 1 cup whipping cream
Preparation
  • Preheat oven to 300 degrees.
  • Break up graham cracker and place them in food processor and process until the crackers are crumbs
  • Pour crumbs into a bowl, add butter, and stir to mix
  • Pour buttered crumbs into springform pan and press mixture evenly over bottom and up side of pan
  • In a large bowl, with a mixer on medium speed, beat cream cheese and 3/4 cup sugar until smooth
  • Add eggs 1 at a time, beating well after each addition and scraping down inside of bowl as needed
  • Beat in flour, brandy, and 1 1/2 tsp. nutmeg just until incorporated
  • Pour into crumb-lined pan and bake 40 to 50 minutes
  • Put cheesecake on a rack and let cool completely. Cover and chill until cold, at least 3 hours
  • Remove pan rim
  • In a small bowl, whisk together cream and remaining 1/4 cup sugar until stiff peaks form (10 minutes)
  • Dollop whipped cream onto cheesecake and sprinkle with remaining 1/2 tsp. nutmeg.

Monday, December 7, 2009

Wine Cake


I had to make the desserts for a dinner party over the weekend. Now we're not big dessert people. They say there are salt people and sugar people. We're definitely salt people. A container of ice cream can sit in the freezer for months. But a bag of chips won't last two days.

This recipe comes from my late mother-in-law and it's pretty simple and straight forward. It was always a favorite with all of the relatives. Fortunately, I was able to get the recipe. It's a great holiday recipe as it fills the house with the welcoming smell of nutmeg. It's not too sweet which is good for us salt people. The cake goes well with ice cream and/or fruit could be placed in the center.

Ingredients:
  • 1 package of yellow cake mix (1 lb. 3 oz.)
  • 1 package of vanilla custard (3.4 oz.)
  • 4 eggs
  • 3/4 cup olive oil
  • 3/4 cup sherry (next time I might try 1 cup)
  • 1 teaspoon ground nutmeg
  • powdered sugar
Preparation steps:
  • Preheat oven to 350 degrees
  • Combine all ingredients, except powdered sugar, in a large bowl
  • Mix with electric mixer at medium speed for 5 minutes
  • Pour into greased bundt pan
  • Bake for 45 minutes
  • Let cool in pan before turning out
  • Sprinkle top with powdered sugar
Let the cake cool thoroughly before turning it out of the pan. Use a screen strainer/colander for the powdered sugar garnish. Spoon the sugar into the bottom of the colander and use your fingers to force the sugar through the screen.

Saturday, November 28, 2009

In the Garden: End of November 2009

As the weather cleared and warmed up this afternoon, I went out and pulled up the 8 basil plants. They were dropping their leaves and the stalks were turning brown. Time to go!

The three tomato plants were also pulled up and I was able to harvest the last 5 tomatoes that were not chewed up by raccoons. Cutting back the tomatoes will provide some welcome sunlight to the romaine lettuce I planted a few weeks ago. They managed to take despite being in the shadow of the tomato plants. Now that they are established, I think they will welcome the sun.


With both the basil and tomato plants out, there was a fair amount of open real estate in the beds. I took the opportunity to work in some organic fertilizer into the soil in these areas.
I will look for some more fall crops to add.

The bell pepper plant is still producing and I harvested two peppers today with more still growing!

Sunday, November 22, 2009

Leek Confit

Whenever leeks are in the box, the obvious choices come to mind: soup stock or leek and potato soup. While both are excellent choices, there are times when you don't have the ingredients, time, or inclination. Two leeks were sitting in the fridge from last week's box and they were starting to look a little tired. Then I came across this article in Bon Appetit which helped me see new possibilities for the leeks.

This morning I adapted the recipe that comes with the article for Leek Confit. The end product is something so simple, tasty, and adaptable to a variety of uses. As the article says:
Serve warm with fillets of salmon, in scrambled eggs or pasta, or on crostini with goat cheese.

I used a good portion (along with some sauteed arugula) in this morning's scrambled eggs (Yum!). The remainder will be added to tonight's flatbread pizzas.

Leek Confit
  • 2 leeks, green stalks cut off using only white and pale green parts, cleaned, cut lengthwise, and then thinly sliced
  • butter, 2-3 tablespoons
  • salt, no more than 1/4 teaspoon
  • water
  • Melt butter in a medium skillet
  • Add leeks and stir to coat. I gave them some time to soften in the butter stirring often
  • Add water and salt. I didn't measure the water. I just added enough to cover less than half of the bottom of the skillet
  • Cover pot and reduce heat if needed
  • Simmer until leeks are soft stirring often
  • Uncover and continue to cook until remaining water evaporates
Can be chilled in the refrigerator for up to a week.

Also explore:
http://rahchachow.blogspot.com/2008/12/recipe-that-made-me-love-leeks.html
http://thecosmiccowgirl.wordpress.com/2009/03/19/leek-confit/

Sunday, November 15, 2009

In the Garden: November 2009


Basil
I picked the last of the green leaves from the dying basil plant. It's amazing that it's the middle of November and I'm making yet another batch of pesto for the freezer from just-picked basil. I think I will pull up the basil next weekend. They were put into the ground seven months ago and my goal was to have enough in the freezer to not need to buy pesto in the store.

Fall Garden

Following the advice from my local nursery, I decided to try my hand at a fall garden. Last weekend, I planted more lettuce (romaine) and sugar peas.

Wednesday, November 11, 2009

Azteca Squash Soup

I was paging through an old Bon App that was sitting around and a recipe caught my eye.

As I read I thought, I had bell peppers, limes, tomatoes, and jalapeno peppers from the backyard. I had a butternut squash sitting in the pantry. I had cilantro from the box in the fridge. I had some avocado that needed to be used. I had leftover non-fat sour cream in the fridge. It was a perfect storm of ingredients for this recipe. The recipe was from the
Rancho La Puerta resort in Mexico. I have two of their cookbooks and I could not locate this recipe in either cookbook. We decided that this adaptation was a keeper. Start early because it takes awhile to do the first few steps but later things can slow down and wait.

Azteca Squash Soup

Ingredients:
  • 1 medium butternut squash, halved and seeded
  • 1-2 tablespoons olive oil
  • 1 medium-sized onion, diced
  • 1 cup celery, chopped (about 1 stalk)
  • 2-4 cloves garlic, minced
  • 6 cups of broth
  • 1 teaspoon cumin
  • 1 cup canned black beans, drained and rinsed
  • 1 cup frozen corn kernels
  • 1 bell pepper, diced
  • 1-2 jalapeno peppers, seeded and sliced
  • juice of half a lime
  • cilantro leaves, chopped tomato, diced avocado, non-fat sour cream for garnish
Procedures:
  • Early in the day or the day before:
  • Preheat oven to 400 degrees
  • Cut the butternut squash in half and clean out
  • Spray nonstick spray on a baking dish
  • Sprinkle cut squash with salt and pepper and lay cut side down into the baking dish
  • Roast until tender, 1 to 1 1/2 hours
  • When cooked, remove squash from oven and turn squash cut side up to cool
  • When cool, scoop squash into a medium bowl
  • Closer to serving time:
  • Heat oil in a large pot and add onion, cook until onion is pale golden (5-10 minutes)
  • Mix in celery, garlic, and 1 cup of broth
  • Cover and simmer for 10 minutes stirring occasionally, add salt and pepper to taste
  • Add butternut squash, 5 cups of broth, and cumin
  • Cover and let simmer for 20 minutes to blend flavors
  • Prior to serving:
  • Use an immersion blender to puree the mix until smooth
  • Squeeze in lime juice
  • Add black beans, corn kernels, bell peppers, and jalapeno peppers (I also added in sliced and sauteed veggie sausages)
  • Cover and simmer for 10 minutes
  • Serve into bowls and garnish with your choice of non-fat sour cream (or plain yogurt), diced tomatoes, diced avocados, cilantro leaves


Tuesday, November 3, 2009

Roasted Pumpkin Seeds

Whenever you have pumpkins you have to deal with the seeds. Normally, I find roasted pumpkin seeds too fibrous for my taste. But I found a number of sites online that recommended putting the seeds in salted water for some time which breaks down some of the woodiness of pumpkin seeds. Some recipes suggested soaking seeds overnight in salted water. Others suggested bringing the seeds to a boil in salted water for 15-20 minutes. I tried the latter with the saved seeds from the pumpkin soup recipe. The salt water does do a good job of making the seeds more palatable.

For the seasoning, I used the recipe I found online at SeriousEats for spicy roasted pumpkin seeds. It's a pretty good start. I'd like to feel more spice but at work and at home these were well received as is. There is definitely room to experiment.

Rinse the pumpkin seeds in a colander. Spread the seeds on a cookie sheet, single layer, and let dry overnight.

Spicy Roasted Pumpkin Seeds

Ingredients:
  • 1 cup pumpkin seeds, cleaned and dried
  • 1 tablespoon olive oil
  • 1/2 tablespoon paprika
  • 1/2 tablespoon chili powder
  • 1/2 tablespoon kosher salt
Procedure:
  • Preheat oven to 350 degrees
  • Mix seeds in a bowl with all ingredients
  • Spread on a foil-covered cookie sheet
  • Place seeds in the oven for 15 minutes
  • Remove from oven and let cool

Sunday, November 1, 2009

Pumpkin and Black Bean Soup

We got two pumpkins in last week's box and I adapted a good-looking recipe from the October 18 SF Chronicle newspaper for Pumpkin & Black Bean Soup. Below is my adaption of the original recipe.

Ingredients:
  • 1 medium-sized sugar pumpkin
  • broth
  • 2 tablespoons olive oil
  • 1 yellow onion, finely diced
  • 4 cloves garlic, minced
  • 1 teaspoon of herbs (original recipe calls for savory and thyme. I used Penzey's Bouquet Garni)
  • 2 jalapeno peppers, seeded and finely diced
  • 1 teaspoon kosher salt (original recipe calls for 2 teaspoons which I followed but we thought it was too salty)
  • 1 can black beans, drained and rinsed
  • black pepper, to taste
  • cilantro leaves, about 5 per soup bowl
  • 1 tablespoon low fat sour cream
  • 1 small red bell or gypsy pepper, diced
Instructions:
  • Roast the pumpkin. Here is a picturesque site that is helpful on how to cut and clean the pumpkin. This can be done one or two days ahead of making the soup.
  • Heat broth in a pot and add cooked pumpkin. Use an immersion blender to puree the pumpkin and broth mixture.
  • In a large sauce pot, heat olive oil over medium heat and add onion. Saute until tender, about 5 minutes.
  • Add garlic and jalapeno peppers.
  • Add black beans, herbs, black pepper, and salt and stir to mix
  • Pour in pumpkin stock mix
  • Ladle into bowls and garnish with sour cream, diced red peppers, and cilantro leaves
We found that the cilantro really adds a great counterpoint to the recipe so don't skip this step.

Saturday, October 24, 2009

Mayonnaise with Pullets and Canola

We get our eggs from a friend who raises chickens in his backyard in Fremont. He keeps a variety of types so the shell colors vary. The chickens have a nice set up and they spend a portion of the day wandering around the backyard pecking at things. We notice the difference.

Last week we were offered a dozen pullet eggs. Being a city slicker, I had no idea what a pullet egg was. A Google search told me that pullets are adolescent chickens that are just beginning to lay eggs. The egg itself is smaller and some may contain no yolk. It's hard to tell in the photo but the front two are pullet eggs and the back two regular large eggs. Some chefs claim pullets are superior to the extra large eggs we are accustomed to seeking. Here's a link if you want to read more.

I decided to try the pullet eggs in a homemade mayonnaise recipe I got from a colleague with some embellishments after doing some online research.

Mayonnaise
  • Try to have all ingredients at room temperature
  • 1 egg - I used 2 pullets
  • Salt - 1 teaspoon
  • Yellow mustard - 1 teaspoon (mustard powder is an option)
  • Sugar - 1 teaspoon
  • Canola Oil - 2 cups
  • Vinegar or lemon juice - 1 tablespoon
  1. Combine egg, salt, sugar, and mustard in a bowl and mix with an electric mixer on low speed until well blended (about 30 seconds)
  2. With the electric mixer on high speed, gradually pour in oil. At first, use a 1/4 teaspoon measure to add the oil drop by drop. After awhile you can switch to a teaspoon. Keep mixing while continuing to slowly add oil. After the first cup is in you can start adding oil with a tablespoon but still do it slowly and make sure the oil is mixed in before adding more (this should take 15 minutes or more)
  3. Add vinegar or lemon juice to set. Keep mixing until well incorporated
  4. Leave at room temperature for 1-2 hours then refrigerate
Other recipes to explore:
Alton Brown's Food Network Recipe
Mayonnaise Recipe from Cooking with Amy

Thursday, October 8, 2009

Reforming the Food System

Michael Pollan was recently interviewed on NPR's Living on Earth radio show (http://stream.loe.org/audio/090918/090918pollan.mp3). It is a great interview and he ties together our fossil fuel-based food system with health care reform and climate change. It is worth a listen

... our eating habits, what happens on our plate represents our deepest, most powerful engagement with the rest of the world.

Saturday, October 3, 2009

Notes on Apple Tree Care

I am confused about my apple tree. The apple tree is about done producing for the year and I have not been able to get many apples. They never seemed ripe enough to eat. I kept waiting for the skin to lose the brown color and for the green to emerge. During that time the birds and squirrels were enjoying them. What's going on is unclear to me. So I thought I would do some online research and make notes for next year.

  • Winter Pruning: Prune the tree in the winter while it is dormant. Late winter or early spring is best. After the frost season.
  • Spraying: A regular spray program is essential for high fruit quality and healthy trees. Use a multipurpose fungicide and insecticide labeled for apples. These can be obtained from a garden center and will include application instructions.
  • Spraying: A horticultural oil should also be sprayed on apple trees at the first sign of green growth in the spring to suffocate scale insects and reduce overwintering mite and aphid eggs. For homeowners with only a few trees, premixed orchard sprays are available from many garden centers. Begin applications after full bloom is over and spray every 10 to 14 days through-out the summer.
  • Fertilize: Apply one pound of fertilizer in early spring before growth begins. Broadcast it evenly on the soil surface under the entire branch spread of the tree. Keep it away from the base of the tree to avoid burning. A complete garden fertilizer such as 10-10-10 is best.
  • Thin Fruit: Apple trees often set a heavier crop of fruit than the limbs can withstand. To ensure good fruit size, return bloom for the following year, and to prevent tree breakage, it is necessary to thin the fruit. Every apple blossom results in a bloom cluster of 5 to 6 blossoms. Apples should be thinned when they are about the size of a dime. Cut off enough fruit so that the remaining apples are spaced 4 to 6 inches apart, and leave only one fruit per cluster. It may seem like very few fruit remain, but you will harvest higher-quality fruit, potentially reduce insect and disease problems, and increase the chances for a full crop the next season.
  • Fertilize end of season: Give fruiting and spring flowering plants a dose of E.B. Stone Ultra Bloom before they drop their leaves for winter and go dormant. This gives it the right nutrients to store in order to put on a better show in the spring or to produce better fruit in the coming year.
Site:
http://www.ces.ncsu.edu/depts/hort/hil/hil-8301.html

Sunday, September 20, 2009

Leek, Potato, and Bean Soup

We got a single, large leek in the box this week. Whenever I see 2-3 leeks my mind immediately goes to my vegetable broth where leeks are an important ingredient. But this was just one leek and it was going to be a busy week. We also received 1.5 pounds of Yukon potatoes and then I thought that potato-leek was a very common soup combo. So I went to work. I adapted an Alice Waters recipe in The Art of Simple Food using the ingredients I had on hand and this is was what opened tonight's meal:

Ingredients:
  • 1 large leek
  • 3 Tbsp butter
  • 2 sprigs of sage (original recipe called for thyme. I happened to have some extra sage on hand so I used that instead. Be creative.)
  • 1 large bay leaf
  • Salt
  • 1 pound of Yukon yellow potatoes, peeled and quartered
  • Cannelli beans (I used some home-prepred beans but 1 can of commercial beans will do. More on the homemade beans later.)
  • 5 cups water or broth (Tonight I used TJ's vegetable broth from the pantry)
  • dried parsley as garnish
  • black pepper to taste
Procedure:
  • Trim off the root and green end of the leek
  • Slice thinly and soak in water to clean
  • Drain and dry sliced leeks
  • In a medium pot melt butter and add leeks with bay leaf, herbs, and salt
  • Cook for about 10 minutes until leeks are soft
  • As leeks cook, peel and quarter the potatoes
  • Add potatoes and cook for 4-5 minutes until coated
  • Add broth (or water)
  • Bring to a boil and then turn to simmer for about an hour until the potatoes are soft enough to mash on the edge of the pot with a wooden spoon
  • Allow to cool, remove bay leaf, herb sprigs, and puree the soup with a hand blender
  • Add cannelli beans and stir in freshly ground black pepper
  • Let simmer for 10-15 minutes
  • Add a pat of butter and garnish with dried parsley
Serve with good crusty bread and wine.

Sunday, September 13, 2009

Buy Fresh Buy Local


I just picked up the latest Buy Fresh Buy Local guide at Whole Foods this afternoon. It's an excellent guide covering the entire bay area county by county. In it you will find:
  • a complete listing of all of the farmer's markets listed by day of the week
  • a Bay Area seasonality guide to let you know what's growing when
  • a listing of the CSAs that distribute to the Bay Area
  • food-friendly restaurants, stores, growers, and more
The guide is available for download at the web site.

The main website is: http://guide.buylocalca.org/index.html

Saturday, September 12, 2009

Kitchen Rules to Live By


BonAppetit magazine recently did an article on Italian peasant food. In it they included a sidebar with the "Seven Rules of an Italian Kitchen." While the rules were specific to Italy and Italians, I thought that at the core there were some valuable concepts that I know I try to follow. Below is my version of those rules:
  • Eat with the seasons: Pay attention to what is coming into to your farmer's market or supermarket. Choose food that is local and seasonal. A CSA delivery box does this for you.
  • Love leftovers: Never throw away food. Use leftovers in dishes like scrambled eggs, quiche, pasta, or a stir fry.
  • Keep it simple: Olive oil and garlic go a long way when sauteeing vegetables. Let the ingredients speak for themselves.
  • Taste and savor food: Take time to taste and comment on food. What works? What doesn't? What ingredients could offer an interesting variation? Turn off the TV and focus on food while you eat.
  • Cook creatively: Look at the ingredients you have on hand and figure out ways to use them. This was something I took away from the Frugal Gourmet cookbooks that I used many years ago while I was learning to cook.
  • Grow something: Find a patch of land where you can grow something. Start a container garden on the side of the house. At the very least you can have some clay pots on a window sill for growing herbs. Look in your neighborhood for a place to have a community garden. Share the produce you grow with your neighbors.
  • Share with friends and family: Eat together and invite friends over to share what you cook. I finished the cherry tomato bruschetta at about 5 pm on a Sunday. We called up some nearby friends and asked them to come over and enjoy some red wine and appetizers. We enjoyed the bruschetta, wine, and conversation for a couple of hours out on the back deck.

Monday, September 7, 2009

Cherry Tomato Bruschetta

This was tonight's appetizer:

In a bowl, combine:
  • 1 pint of Capay Valley's mixed medley cherry tomatoes, quartered
  • 3-4 cloves garlic, minced
  • 3-4 fresh basil leaves, chopped
  • 1 Tbsp. Balsamic vinegar
  • 3 Tbsp. extra virgin olive oil
  • Salt and pepper to taste
Stir mixture until well mixed. Let it sit in the fridge for awhile to allow the flavors to marry. Serve with good sourdough bread and red wine. Feel free to add other ingredients you might already have in the fridge: chopped onions, capers, olives.

Sunday, September 6, 2009

In the Garden: September 2009

Tomatoes
Tomatoes are now officially in full production! We harvested more tomatoes after this photo was shot. So there's probably about 30 altogether with more to be picked in the coming days and weeks.

Jalapeno Peppers
The jalapeno peppers are also producing nicely. They are fairly mild so they can be added to a variety of dishes without overwhelming them. One large one went into this morning's eggs (along with onions and mushrooms from the box).

Peaches
The peach tree is at the end of production. There are just a few more left on the tree after I picked these.

Celery
I finally just pulled up the celery. It was not producing anything edible. Celery is a cool season plant and planting it in spring/summer was a mistake.

Basil
I spent some time in the garden yesterday picking off the flower heads on the basil plants. After attending a workshop at a local nursery, I learned that the growing season for the east bay goes through October. There is still 8 weeks of production left on the basil. So I decided to get aggressive and remove all of the flowers and "going to seed" stalks. I harvested more basil and made yet another round of pesto. I may well reach my goal of having enough pesto in the freezer to not need any store pesto for an entire year.

Saturday, September 5, 2009

Beet and Fennel Salad

Some of the FFTY box contents for this week have already been used. Most of the heirloom tomatoes along with some parsley were used in tonight's pasta puttanesca dinner. I dried the rest of the parsley using the oven method covered earlier.

Also in this week's box was a bunch of beets. Soon after we started the FFTY box, I learned that I actually like fresh-cooked beets. The first time we got beets in the box (2007), I made a recipe that was, for the most part, on the FFTY sheet that comes with each box. Today, I cooked the beets and made the recipe again. There's room for variation but here's the basic recipe:

Ingredients:

  • 1 bunch beets
  • 2 Tbsp capers
  • 1/4 cup olive oil
  • 3 Tbsp sherry vinegar (use what you have on hand)
  • 1 fennel head
Steps:
  • Early in the day, preheat oven to 375 degrees
  • Trim and rinse the beets - keep the beet greens for other uses
  • Place the cleaned beets in a covered pyrex dish with some water (just enough to cover the bottom) and bake for 60 minutes
  • When cooled, peel beets and slice into wedges and place into a large bowl
  • Rinse capers and let dry on a paper towel
  • Heat 1-2 Tbsp. olive oil in a small skillet. Add capers and shake skillet constantly until capers begin to brown -- about 1 minute.
  • Add 3 Tbsp. olive oil to beets in bowl
  • Stir in vinegar and salt to taste
  • Cut the fennel bulb into thin cresents and add to beets
  • Add capers and stir mixture to coat


Tuesday, September 1, 2009

Time For Lunch

A recent SF Chronicle article said:
The Centers for Disease Control and Prevention have stated that of the children born in the year 2000, 1 out of 3 Caucasians and 2 out of 3 African Americans and Hispanics will contract diabetes in their lifetimes. As a result, that generation will be the first in our country's history to die at a younger age than their parents.

Consider getting involved in the Time for Lunch program. It is an offshoot of the Slow Food Movement and their goal is to influence legislation that governs our students lunch program to include more locally grown fruits and vegetables.

Saturday, August 29, 2009

In the Garden: August 2009

A nice harvest from the backyard today: 30+ peaches, about 20 tomatoes, and 10 jalapeno peppers. I see some recipe searching for salsa.

Tomatoes: As the tomatoes began to ripen, I noticed that the bottom of the fruit had a brown rot. I did some research and learned that I had Blossom End Rot or BER. It has to do with either irregular watering and/or not enough calcium in the soil. I suspect over-watering. It can't be inconsistent watering since the beds are on a timer. So I cut back the amount of water. I think it may have helped since I was able to harvest some intact tomatoes today but I also composted just as many. Next year, I should also mulch the vegetables to keep the soil moist and keep the timer at 5 minutes or less.

Zucchini: Pulled it up a few weeks ago. Phew, done with zucchini! Next year, try a new and different kind of squash.

Peaches: They are just coming into season now. I could have harvested more today. Next year, I need to thin out the peaches (along with the apricots) as the fruit begins to form. With so many so close together they tend to push each other off as they grow larger.

Friday, August 21, 2009

Smoked Salmon


I'd seen them before. They would be at our local Farmer's Market from time to time. They seemed very friendly and would offer a sample. But I avoided making eye contact with them and would politely decline. I mean, you don't go to the farmers market to buy smoked salmon! What are you guys doing here, anyway?

Last week, I decided to adopt a new attitude and I marched right up and gladly accepted a sample. One taste was all we needed. We went home with a package.

The company is Blue Ocean Smokehouse (the web site needs some development), they are based out of Half Moon Bay, and they make some excellent, tasty smoked salmon.

Most smoked salmon (especially the icky store stuff) has a chemical aftertaste. But this tasted exactly like, well, smoked salmon. The fish was quite tender and fresh tasting. We paid a pretty penny for it but it was worth it. We got a head piece (thicker fish). The vendor said some people prefer the tail because the flavor is more intense (next time).

We made a simple pasta dish with sauteed onions, tomatoes, and basil. Added the flaked salmon at the last minute. Some cheese sprinkled on top. We saved enough salmon to have some in our scrambled eggs on Sunday morning. Good stuff!

Sunday, August 9, 2009

Heirloom Tomato Pasta Puttanesca

Our good friends and fellow FFTY'ers gave this recipe based on the excellent heirloom tomatoes in the box this week. It's great with regular tomatoes but "sublime with heirlooms."

Ingredients:
  • 2 lbs. heirloom tomatoes
  • 1/2 tsp. chili flakes
  • 3-4 anchovy fillets
  • 1/2 cup oil-cured black olives
  • 3 tsp. capers
  • 2 cloves garlic
  • 1 small bunch of Italian parsley
  • sea salt
  • Romano cheese
  • 1 lb. pasta (penne or spaghetti)
Preparation:
  • Chop anchovies into a paste (Don't skip this ingredient. Get a small jar of anchovy fillets at Whole Foods. It's $1.29. I know what you're thinking).
  • Pit and coarsely chop the olives (Joanne Weir gives a great tip on always buying your olives from the bulk section of the supermarket instead of canned. I used some Whole Foods black olives cured in Fines Herbes).
  • Chop the parsley (I used backyard flat leaf parsley).
  • Finely chop the garlic
  • Coarsely chop the capers
  • Core, seed, and cut the heirloom tomatoes into small dice (Given the high water content of the heirloom tomatoes I might have drained them in a colander for a bit first).
Combine all ingredients except pasta and let it rest for at least an hour. Cook the pasta in sea salted water until al dente. Toss with the sauce.

Serve with crusty bread and some good red wine.


Saturday, August 8, 2009

Drying Backyard Parsley

Before going on vacation a few weeks ago, I harvested two bunches of flat-leaf parsley from the yard with the intent of drying them. I had read that air drying for 2-3 weeks was one method. I hung a bunch in the garage and another in the pantry. They were hung from the ceiling by string. But as the herb dried and shrunk it slipped out of the string. When I got home the parsley was yellow and much had fallen to the ground. Conclusion: Air drying doesn't work.

This evening I harvested more parsley to try out some different drying techniques. I washed it, spun it in a salad spinner, and let it dry for a few hours. I read more than one story about things going back if you tried to dry damp herbs.

I tried two different approaches:


Microwave: I read mostly favorable reviews (but a few bad ones) that said that drying in the microwave was a good way to go. Nuke them in small batches in a single layer with a paper towel beneath and above. Cook 30 seconds at a time and check. A small batch should take 2 minutes. But my second and larger batch took 3 minutes.

Oven
: I read a few different reviews. One said to set the oven to 100 degrees, but most ovens won't go that low. Another said to set the oven to 185 and cook until dried (20-30 minutes). The one I tried had the oven at 250 degrees but you turn it off once the temperature is set. Place the parsley leaves on a cookie sheet in a single layer and put them in the just turned off oven for 30 minutes.

As all of this went on, I pulled out my existing jar of parsley. I turned the jar over and it read, "Best by Dec. 18. 05." I tossed the contents.

In the end, I couldn't tell too much difference between the oven and microwave dried parsley. If I had to choose I thought the oven did a better job of completely drying out the herb.

I pulsed both methods together in a food processor until they were chopped. I put the chopped leaves in the jar that had the old parsley.

Wednesday, August 5, 2009

Out of the Kitchen, Onto the Couch

Michael Pollan being interviewed recently on NPR's Fresh Air. In the interview he discusses the rise of cooking shows from Julia Childs to the Food Network while at the same time the amount of time we spend cooking (27 minutes a day) is half of what it was in the 1960's. He dives into the reasons why we're cooking less and "allowing corporations to cook for us" more. An interesting listen.

Tuesday, August 4, 2009

Irish Butter

We've just returned from a three week trip to Ireland. I'm of Irish descent and, while this was not the first time there, it was a chance to revisit the country as an adult. I was pleasantly surprised by the food and I will post a few entries on my findings there.

Let's begin with the butter! Irish butter is simply incredible. Butter on a piece of bread is usually just a condiment, but with Irish butter it's another ingredient to be enjoyed and savored (along with the wonderful brown bread they make!). After getting home I wondered what was the difference. Some research revealed that organically-raised cows make the difference. Go figure.

In Ireland, it seems that all cows are grass fed. Here, grass-fed beef is a premium. There, it's a way of life. Not only that, but for every acre of land there are only 20-30 cows at the most. Each cow has room to move around, lay down, and feed. Calves stay with their mother and continue to feed from her. The cows (and sheep) eat grass, heather, and wild herbs that the Irish say they can taste in the meat. The cows are not overwhelmed by flies and the stench of the American factory farm is not there.

For the most part, I don't eat meat but in Ireland I ordered lamb a number of times since I was comfortable that the animal was raised organically and humanely. Hiking through the Irish countryside gave me lots of opportunities to see how they raise their animals.

This website speaks to the quality of the animal that provides the butter: "The butters are made from milk from different breeds of cow that are fed in different climates eating different fodder- all factors that influence the final product."

Two qualities differentiate Irish butter: Color and fat content. The color is more yellow which is from the beta carotene in the intense green grass that cows consume. I compared the nutritional analysis of the Kerrygold with TJ's regular brand and Whole Foods' 365 brand. Most of the numbers were the same (365 was higher in sodium) but Irish butter was slightly higher in saturated fats. While saturated fats are the "bad" fats it is likely the stuff that contributes to the texture and feel of the butter.

Irish butter is readily available at your local supermarket and Trader Joe's. One of the brands available at both is the Kerrygold label. Their website states,
"Our grass fed cows ... produce the sweetest, richest milk in the world. It's the reason our butter tastes silkier and creamier and glows a healthy, golden yellow like the sun."


Give it a try.

Thursday, July 9, 2009

Vegetable Gardening: July 2009

Spent some time this afternoon in the garden working on things. The evening light was perfect for taking a few photos as well.

Adios, Arugula
After going to seed for the second time, I just decided it was time to yank these out of the ground. It was no longer producing the small, delicate leaves that you normally get.
I harvested enough leaves for a final batch of arugula pesto.

Hey, Broccoli
There are three heads about ready for picking and it looks like more on the way. This is such a fun plant to watch grow. It's pretty low maintenance as well.

Picking Parsley
The Italian flat leaf parsley is doing great. Today I harvested two batches with the intent of drying them. Reading online it seems they need to hang in warm dark place for 2-4 weeks. I hung one batch in the pantry (temperature constant but on the cooler side, dark) and one bunch in the garage (warmer due to the dryer being in there, dark, more temperature variation). I'll report back on these in a few weeks.

Zucchini
What more can be said? We're swimming in it. We're giving it away. We're making zucchini bread on a daily basis. We're searching the internet for zucchini ideas.

Here's a shot of zucchini plant leaves in the afternoon light. Thankfully, the two plants we have are nearing the end of production.


Let us have lettuce

We have been enjoying fresh salads with just-picked lettuce leaves. The romaine heads probably have only a few weeks left in them before they will start going to seed. The Red Sails are winners.

Basil
I have made about four batches of basil pesto and stuck them in the freezer. More to be made tomorrow. This year's plants did not grow as tall as last year's most likely due to the cooler summer we've had this year. But overall, they have done pretty well once we got some heat and sunshine.

Apricots
Seem to be days away from ripening! Other fruit trees are on their way!

Monday, July 6, 2009

Roasted Peppers


This week's box included a pound of "mixed sweet peppers." Once I removed everything from the box it seemed like a lot of small peppers. We had a bowl of peppers sitting there and it seemed that they would not last too much longer.

I decided to try my hand at roasting the peppers. I spent some time on Google and was most struck by this entry on roasting peppers so I followed the recipe. The only addition I did was to cover the peppers in plastic wrap as they cooled in a pyrex dish. I read a number of other sites that recommended this.


Once cooled, I peeled and seeded the peppers--a messy task. I toyed with idea of canning them but there wasn't enough to fill a small jar so I decided that a roasted pepper pizza the next day was in order.

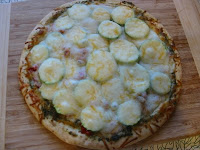
Tonight's dinner was a roasted pepper and zucchini (from the backyard) pizza. The roasted peppers were very sweet and flavorful.


Friday, July 3, 2009

Zucchini Bread

Zucchini bread is the stuff of my childhood. My mother would make it when there was too much zucchini to consume. She would put the finished loaves in the freezer and they would be brought back out in the fall and winter when the delicious bread with cinnamon and nutmeg aromas would be the perfect dessert. We would add a scoop of vanilla ice cream as an extra treat.

Our backyard zucchini is in full production and then we got more in our FFTY box! In the backyard, it's easy to go out one morning and find that yesterday's petite squash is now the size of a man's arm. These are the ones I like to use to make zucchini bread.

This recipe I found online awhile ago and it seems to run close to what I remember mom making. The author adapted a 1974 Sunset recipe. I omitted the 1 cup of walnuts since I am allergic to them.

Zucchini Bread
Ingredients
  • 3 eggs
  • 1 cup olive oil
  • 2 cups sugar
  • 2 teaspoons vanilla extract
  • 2 cups grated zucchini (I am very liberal on this one)
  • 1 cup crushed pineapple (here too since I love pineapple)
  • 3 cups flour
  • 2 teaspoon baking soda
  • 1/2 teaspoon baking powder
  • 1 teaspoon salt
  • 1 1/2 teaspoon cinnamon
  • 3/4 teaspoon nutmeg
  • 1 cup raisins (optional)
Procedure
  • Grate zucchini and place in a colander to drain
  • In a large bowl combine flour, baking soda, baking powder, salt, cinnamon, and nutmeg; stir to mix
  • Preheat oven to 350 degrees
  • In a bowl, beat eggs with a hand mixer until they are a consistent yellow color
  • Transfer eggs to Kitchen Aid mixer and add oil, sugar, and vanilla and mix 3-4 minutes until thick and foamy
  • Stir in zucchini and pineapple
  • Add dry mixture in parts allowing it to absorb before adding more
  • Stir in raisins or nuts if you're using them
  • Divide batter amongst greased and flour-dusted bread pans
  • Bake 45 minutes to an hour or until a wooden toothpick inserted in the middle comes out clean
  • Cool in pans for 10 or minutes
  • Turn out leaves onto a wire rack and let them cool completely


I wrap them in plastic wrap and then foil for the freezer. As I type, the 45 minute baking time is just about up and the kitchen is filled with a wonderful aroma.

Monday, June 29, 2009

Basil Pesto

We eat a lot of pesto. It's a magical blend of ingredients that can tie together a variety of ingredients. Pesto gets its name from the same origin as pestle. Pesta is Latin for to pound or to crush. This evening I made my second batch of pesto with basil from the yard. Now that we have some heat the basil plants have definitely come to life. Pesto is so easy to make and it freezes well so you can just "make and freeze" and enjoy your pesto all year. The ingredients are simple: Basil - Freshly picked, washed, and thoroughly dried. Two handfuls of leaves is good. Garlic - 3-4 cloves, minced. Pine nuts - 1/3 cup. Buy a big bag at Costco and keep it in the freezer. It keeps well and because of its high fat content you can throw frozen nuts right into the food processor. You can play with other nuts as well - walnuts, cashews, etc. Cheese - Parmesan or Romano work best. Salt and pepper - to taste. Olive oil - Use only high quality olive oil. If you look online you'll see a lot of variations: lemon juice, add a tablespoon of sugar, etc. Be creative. Throw all ingredients except olive oil into a food processor. Pulse it enough to break it down into a meal. Then turn it on and slowly add olive oil until you reach your desired consistency. Taste and adjust as needed.

Thursday, June 25, 2009

First Broccoli


Things continue to go well in the garden. With the days so long I'm able to come home from work and spend some time working on the beds. This afternoon, I picked a bunch of lettuce to share with co-workers and neighbors.

But the big news was I harvested my first broccoli bunch. Truly amazing! I cut off the broccoli head and brought it in, washed it, and ate some raw. The texture of the stalk was what struck me most. It actually had texture and flavor not found in store-bought broccoli.

I lightly steamed the broccoli and added it to some cooked tortellini along with some pesto. A salad of red leaf lettuce just-picked from the backyard, heirloom tomatoes from the box and gorgonzola cheese made for a great meal.

Tuesday, June 16, 2009

Vegetable Gardening: June 2009


Things are going pretty well in the vegetable garden.

Arugula
: Quickly went to seed but this last weekend I chopped it back quite a bit. Best to keep it under control. Six arugula plants is a lot for two people.


Parsley
: The Italian flat leaf parsley has been going very well. Easy to grow. I've made a few batches of arugula-parsley pesto and put them in the freezer.


Lettuce: Excellent! There is nothing better than going out and picking leaves of lettuce for that night's salad. Romaine is growing vigorously and I've given a bag of leaves to a neighbor. The Red Sails is less vigorous but sufficient to feed the two of us.

Scallions
: Coming along.


Peppers
: Not too much happening. Probably not hot enough yet. Plus the broccoli is growing over it.


Broccoli
: Whoa! Needs a lot of room. It's a cool weather plant but there is one bunch growing. Look for a better time of year to plant this and give it more room.


Celery
: Coming along. Not sure what to expect.


Basil
: Disappointing. Again, maybe the cool start to our summer. The plants are not growing too fast. They started to go to seed but I nipped off the flower buds. I was hoping to get lots of pesto for us and a neighbor. So far I have made one batch of pesto from farmer's market basil.


Zucchini
: I am harvesting the first zucchini tonight!


Tomatoes
: Growing quite well.

The weather has been so mild so far. This has meant slow growth on some vegetables but it has also meant too cool for pests. I have not had to spray any insecticidal soap thus far.

I also planted a few cosmos in the garden with the hope of attracting some beneficial insects.

Friday, June 12, 2009

Asian Dinner: East Meets West Marinated Asparagus

So the final entry on this "Asian dinner" thread will be about the asparagus side dish I served (no pics). I think this recipe is a keeper. I got it from the May/June issue of Vegetarian Times and it was the cover recipe.

The first step is to toast some sesame seeds. I got fresh sesame seeds from the bulk food section of our local (San Ramon) Whole Foods store. Heat a small saucepan over medium heat and add a tablespoon of seeds. Every few minutes stir or toss the pan. When seeds are lightly browned, turn off heat and let cool. This can be done days ahead of time.


Ingredients:
  • 3 lbs. fresh asparagus, trimmed
  • 1/3 cup tamari soy sauce
  • 1/3 cup rice wine vinegar
  • 3 tablespoons canola oil
  • 3 cloves garlic, minced
  • 2 tablespoons fresh ginger, grated
  • 1 tablespoon honey
  • pinch cayenne pepper
Steps:
  • Bring a pot of water to boil and add salt
  • Blanch asparagus for 5 minutes or more depending on thickness and then drain
  • Combine soy sauce, vinegar, oil, garlic, ginger, honey, and cayenne
  • Pour sauce over trimmed asparagus into a pyrex baking dish
  • Cover and chill overnight
  • Bring to room temperature
  • Serve with a sprinkle of toasted sesame seeds
The magazine's introduction is apt.
An Asian-inspired marinade brings a balance of sweet, salty, tangy, and spicy to blanched asparagus.


Wednesday, June 10, 2009

Asian Dinner: Marinated Shrimp Skewers over Watermelon Salad

This was another course in the meal. Bold shrimp skewers contrast nicely with a cool salad of fruit and vegetables. It's a great refreshing summer meal. I combined a couple of different recipes.

It begins by marinating raw shrimp in a marinade I adapted from the Bobby Flay cookbook "Boy Gets Grill."
  • 1/3 cup soy sauce
  • 2 cloves garlic, minced
  • 1 tablespoon ginger, grated
  • 1 tablespoon sesame oil
  • 1 tablespoon fresh lime juice
  • 1 tablespoon Vietnamese hot sauce
Soak wooden skewers in water for at least an hour.

Make a salad by combining:
  • 1 shallot, sliced
  • 1 small watermelon, cubed
  • 1/2 English cucumber, peeled, halved, cleaned, and sliced
  • chiffonade of fresh mint leaves
  • 1 small jalapeno pepper, finely chopped
Make a dressing that pulls it all together:
  • 2 teaspoons rice wine vinegar
  • 1 teaspoon sugar
  • dash or more kosher salt
Mix all ingredients together. You can make this a day ahead to save time.

Put 4-5 shrimp on each skewer and fire up the barbecue. Cook the shrimp until done and place skewers on top of the watermelon salad.


Monday, June 8, 2009

Asian Dinner: Sushi Part 2

We had a successful dinner party for 9 people on Sunday. The "theme" was Asian and I made a number of new recipes. I'll try to share a few over time.

I started the meal with a small serving of poke which is a Hawaiian staple. When we've gone to Hawaii we live on this stuff having it every evening as an appetizer with a glass (or two or...) of wine. The Safeway in Kona has a poke counter where you can get a variety of poke styles and fish.

According to this site...

Poke (pronounced "po-keh") means "to slice or cut." As a food dish served as an appetizer or snack, it usually consists of bite-sized pieces of raw, fresh fish mixed with seaweed and kukui nut relish. Today’s poke aficionados, however, incorporate a wide range of ingredients, including all types of seafood (everything from swordfish and snapper to octopus and lobster), herbs, spices, nuts, marinades, fruits, vegetables, seasonings and even tofu.


I discovered that Galvan's Market in San Leandro makes poke quite often. Their poke is a well-seasoned starting point with sesame seeds, salt, and red pepper flakes. One can add a bit of soy sauce and other ingredients.


After the poke I served some sushi rolls that I had made earlier in the day. Making the sushi roll ahead of time made all the difference. Wrap the uncut rolls in plastic and let them sit in the fridge for a few hours. Cut with a sharp knife just prior to serving. The nori wrapper will absorb the water and the starch will make it like a skin on the roll.

I used pre-cooked salad shrimp marinated with hot sauce and soy sauce. I added to the roll:
  • shredded carrots (buy a small bag at the supermarket)
  • slivers of marinated baked tofu
  • slivers of red bell pepper
  • sprouts
It was well received by our guests. I look forward to more fun with sushi rolls.

Saturday, May 30, 2009

Sprout Sushi


I am practicing for an Asian-themed dinner party coming up in June. As an appetizer, I wanted to serve a recipe I saw in Vegetarian Times for Spicy Broccoli Sprout Sushi. A variety of sprouts could be used but this recipe called for the peppery broccoli sprout.


  • 1 cup sushi rice, rinsed and drained (I found it in the bulk foods section of Whole Foods)
  • 1 cup water
  • Nori sheets
  • Avocado, sliced
  • Red bell pepper, thinly sliced
  • Baked tofu (I used teriyaki flavored), cut into thin strips
  • Broccoli sprouts (Safeway)
  • Soy sauce and wasabi for dipping
  1. Place rinsed and drained sushi rice in a saucepan with the water. Bring to a boil. Cover, reduce heat to low and simmer until the water is absorbed.
  2. Remove rice from heat and let cool for about 20 minutes.
  3. Stir in rice vinegar
  4. Lay a nori sheet on a sushi mat. Have a bowl of water and a towel close by.
  5. Spread rice over the nori sheet. With moistened fingers press the rice down. Cover the sheet with rice but leave about an inch and a half at the top uncovered.
  6. Lay a few slices of avocado, bell pepper, and tofu across the center. Cover with sprouts
  7. Brush edges of nori with water.
  8. Tightly roll nori until just the uncovered top is showing. Moisten with wet fingers and complete roll.
  9. Slice and serve with wasabi and soy sauce.
The results were pretty good but we decided that they were a little bland. I made another roll this time using some pre-cooked salad shrimp. I rinsed the shrimp, added some lime juice, a bit of soy sauce, and a dash of Vietnamese hot sauce. These were better. Now that I know how to do this I can experiment some more with other ingredients.


You can search YouTube for sushi rolling directions.