Thursday, November 28, 2013

Kiwi Apple Dressing

We had a number of kiwis in our CSA box recently. I was intrigued by one of the suggested recipes on the sheet in the box. But more on that later.

While researching the background of this fruit, I learned that the name kiwi is has been shortened from its official name: kiwifruit. Most people also assume that kiwis must be from New Zealand. They are actually originally native to northern China where they were declared the National Fruit of China and called "yáng táo." Seeds were taken back to New Zealand where they first fruited in 1910. Twenty years later, they were becoming popular in New Zealand where they were called Chinese Gooseberry. During the WWII years, "Chinese Gooseberry" was too political so it was named "melonette" for a brief time. Then a New Zealand grower and exporter dubbed it kiwifruit in 1959; after the New Zealand bird, kiwi (both small, brown, and furry).

This dressing is super easy to make and is quite unique. Tasting right after its made reveals a lot of complexity with many different flavors working quite well together.

Once you add it as a dressing on a salad you will find that it's a unique, clean, peppery, tangy dressing that is unlike typical dressings you've had. 

Kiwi Apple Dressing:


Ingredients:
  • 2 Tbsp. apple cider vinegar
  • 2 Tbsp. apple juice
  • 1 Tbsp. olive oil
  • 1 Tbsp. water
  • 1/2 teaspoon salt
  • 1/2 teaspoon sugar
  • 1/4 teaspoon freshly cracked pepper
  • 1/4 teaspoon hot pepper sauce (I used Crystal)
  • 3 kiwifruit, peeled and cut into chunks
  • 1 clove garlic, minced
Combine all ingredients in a blender or small food processor and process until smooth.

Refrigerate dressing in an airtight container for up to five days. Stir well before using.

Monday, October 14, 2013

In the Garden: Roasted Tomatillo Salsa

Things are winding down in the garden. I will probably start pulling up the tomato plants soon. For the first time this year, I planted a tomatillo plant and I wasn't sure what to expect. But I quickly learned that tomatillo plants need a good amount of space. While you can keep tomatoes somewhat contained in cages, tomatillos are more of a sprawling plant that can grow 3 feet tall as well as wide. It shot out branches into the nearby basil plants. Since it likely didn't get the sun it needed, my tomatillos were somewhat smaller than normal; though maybe normal for home gardens. One of my goals in planting tomatillos this year was to make salsa verde.

Now I luckily live in a part of the country where I can usually find fresh tomatillos in my supermarket. But the other day in my local supermarket I noticed that canned tomatillos are an option. You will find a variety of opinions about how they compare to fresh but if you have no other choice it's an option.

While we're on the topic, salsa may be one of those condiments (like ketchup and mustard) that don't get used on a daily basis. So you spend $4 on a bottle of salsa and a few months later you find it has turned into a science experiment. I recently read an article suggesting that a more frugal alternative is to spend less than a buck for a 7 ounce can of the highly-rated Herdez salsa verde. You are more likely to use it up before it gets bad. And even if it does go bad, you're out a buck. Look for the 7 ounce can next time you're at the market. I have walked past it all these years because it's not in the same place as the bottled salsas.

Now to the salsa that I made during halftime of the most recent 49er game:

Roasted Tomatillo Salsa

  • 12 good sized tomatillos
  • 3-4 Serrano chiles (4=a very spicy salsa so judge accordingly)
  • 1/3 cup cilantro leaves, chopped
  • 1/4 cup white onion, finely chopped and rinsed

I will let Rick describe the recipe for you and then some.


My variation was to add both the chopped cilantro and onions into the food processor right towards the end. It was a good way to really incorporate the cilantro and onions into the salsa. Garlic and lime juice can also be introduced as additional ingredients. You can always thin it with water as well.

More resources:
LA Times article 
Bonnie Plants: Growing Tomatillos
Sunset Magazine article
YouTube video

Tuesday, September 24, 2013

Spicy Pickled Corn


I'm just starting to get into pickling. I've been drawn to a number of recipes that involve pickling recently. I'm fascinated by the process of preserving fresh produce in this method.

At this time of year it's all about preserving the good produce. Recently, our supermarket had Brentwood corn 6 for $1. Incredible. We picked up six ears and had two for dinner. I dog-eared this recipe in a recent Bon App magazine and gave it a try as way to use up the other four ears of corn. The photo in the magazine was gorgeous and it captured my curiosity.

I made 3 jars. I put up two and one was not filled enough to store so I stuck it in the fridge and figured out how to use it up. I have added the spicy corn to salads, omelettes, and stir fries with good success. It packs a spicy punch so be aware of the heat as you work with it.

I doubled this recipe:

Spicy Pickled Corn

In a large bowl, combine:
  • 2 small red dried chilies
  • 1 seeded thinly sliced jalapeno pepper
  • 1/4 thinly sliced medium red onion
  • 2 ears corn kernels cut off of cooked corn cobs (a few minutes in boiling salted water)
  • 1/4 cup fresh cilantro leaves
  • 1/4 cup lime juice
  • 1/4 tsp. coarsely ground black pepper
Brine
  • 1/2 cup white wine or apple cider vinegar
  • 2 tsp. kosher salt
  • 1 tsp. sugar
  • 3/4 cup water
Bring brine to a boil. Pack sterile jars with corn mixture. Pour brine over the corn mixture to fill the jar (I ended up doubling the already doubled brine mixture). Put the lids on the jars and put them in a hot water bath for 15 minutes. Or else stick jars in the fridge and use up the contents within a few weeks.

Monday, September 9, 2013

Avocado Chimichurri Bruschetta

We were attending a dinner party and we had committed to bringing an appetizer. The theme of the dinner party was a celebration of the end of summer produce. As the date drew closer, we still had not decided on our appetizer. Finally, we decided on making a tomato bruschetta using some backyard tomatoes and CSA box heirloom tomatoes.

But while looking at recipes online, I found this Vegetarian Times recipe so I went for a double bruschetta appetizer. The traditional tomato bruschetta was well received but did not get the raves that this one did.

Serve this during the height of summer or, as we did, in late summer as a reminder of the fresh produce available to us as the days get shorter.

I doubled this recipe:

Avocado Chimichurri Bruschetta

  • 2 tbsp. lemon juice
  • 2 tbsp. red wine vinegar
  • 3 cloves garlic, minced
  • 3/4 tsp. salt
  • 1/2 tsp. red pepper flakes
  • 1/2 tsp. dried oregano
  • 1/4 tsp. ground black pepper
  • 1/4 cup olive oil
  • 1/4 cup cilantro, finely chopped
  • 1/4 cup parsley, finely chopped
  • 2 avocados, pitted and cubed
  • bread, sliced
Combine lemon juice, vinegar, salt, red pepper flakes, oregano, and black pepper in a bowl. Whisk in the oil, then add cilantro and parsley. Fold in avocado cubes. Stir to mix. Spoon avocado mixture onto bread slices (toasting is an option) and serve. Serves 6.

To save time, make the sauce ahead of time but cut the avocados at the last minute.

Wednesday, August 28, 2013

Limoncello Vinaigrette

Awhile ago, I started to experiment with making some homemade limoncello. After a few experiments, I had a 750 ml. bottle plus a ton of jars of it in the pantry. It's a recipe I still need to get back to and continue to perfect. But that's a lot of limoncello for the occasional "digestivo." I had more than a lifetime supply.  So I have been looking for alternative uses for all of my limoncello.

I tried a limoncello and tonic on a hot, summer day and it was pretty good. But I needed more ideas.

Then, I found this recipe online for a limoncello vinaigrette and thought this might be a good way to make a dent in the limoncello.

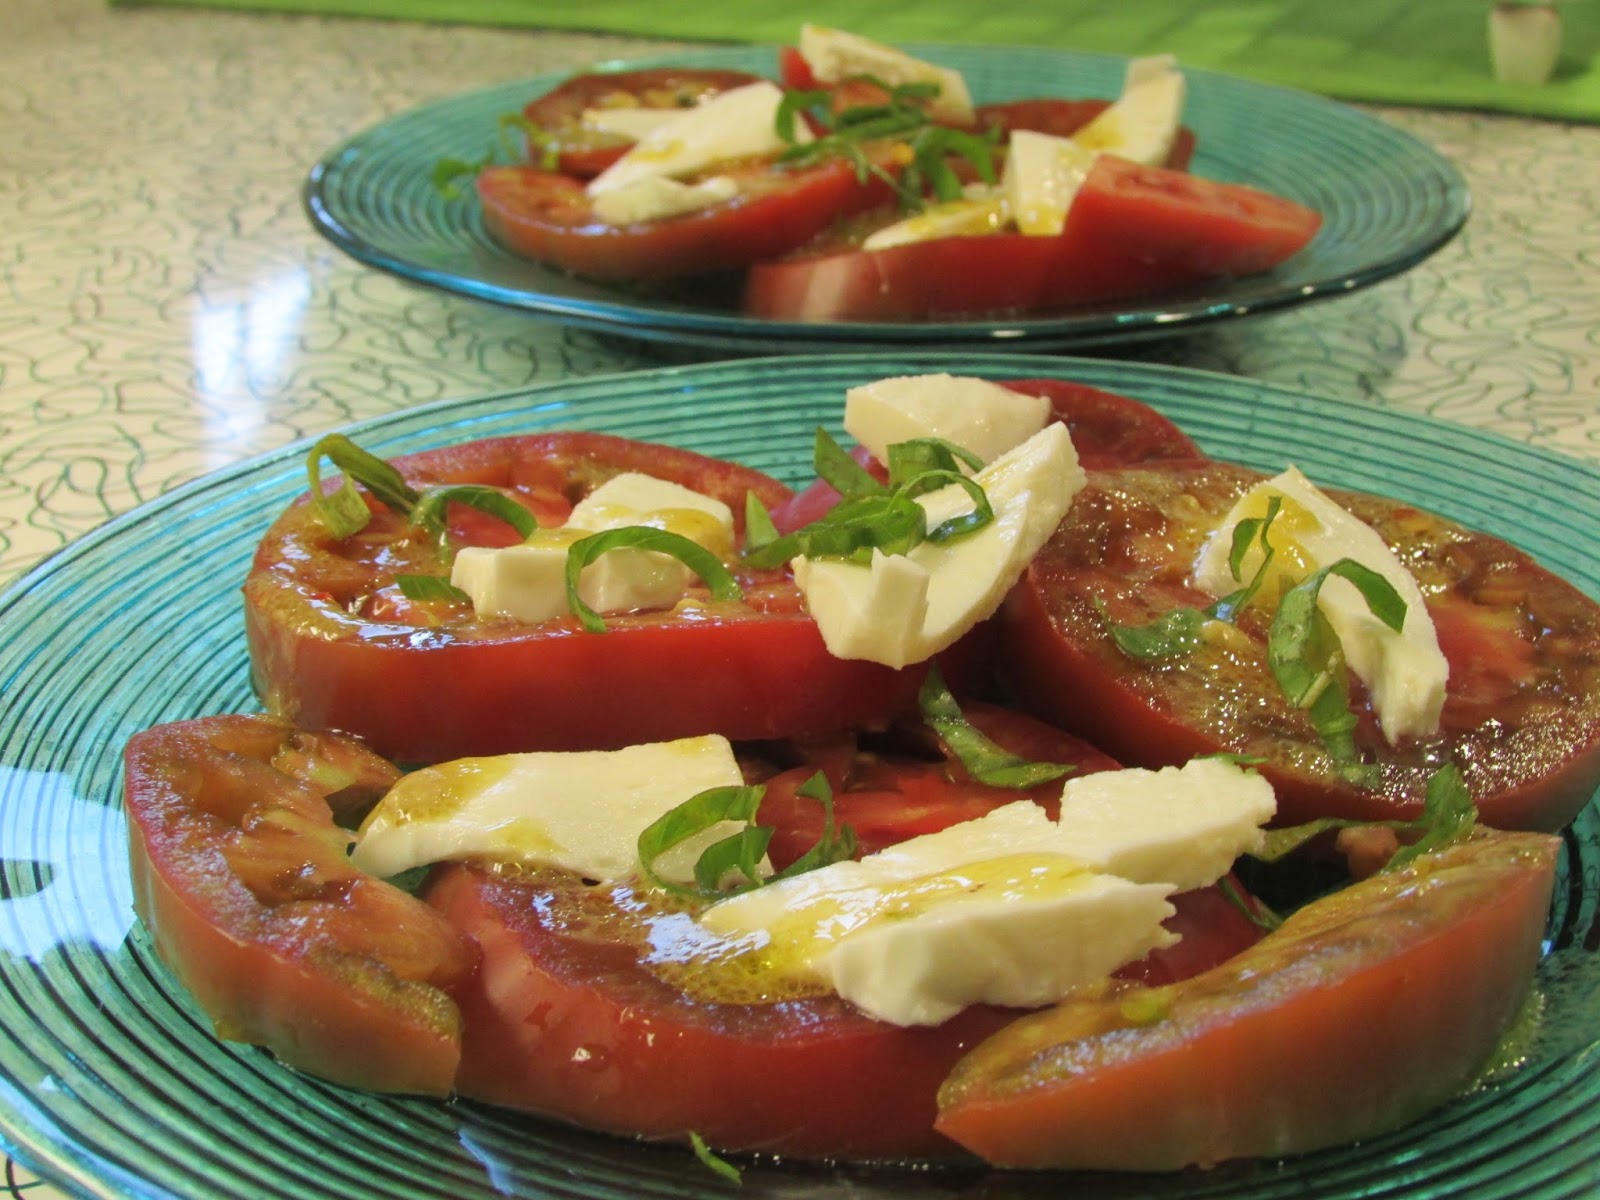
I used it for the first time on a recent dinner. We had some beautiful heirloom tomatoes from our box and some mozzarella cheese. I sliced up the tomatoes and topped them with slices of mozzarella. I added some backyard basil chiffonade and a drizzle of the limoncello vinaigrette on top.

On another night, we had an eggplant so I sliced it, tossed it with some olive oil, and roasted them on the barbecue. As they cooked, I brushed the slices with the vinaigrette with excellent results.

Most recently, I marinated some shrimp in the vinaigrette. I went on to cook them in the skillet for a tasty, weeknight pasta dish. Carnivores can try it with chicken.

Here is another idea:
Mario Batali's Grilled Lobsters with Limoncello Vinaigrette

It's a tasty and versatile vinaigrette with lots of possibilities.

Limoncello Vinaigrette

  • 1/4 cup limoncello
  • 2 teaspoons lemon juice
  • 1 teaspoon grated lemon zest
  • 2 teaspoons Dijon-style mustard (original recipe called for 1 1/5 but 2 or more for me)
  • 1/4 teaspoon red pepper flakes (I went a little more than that)
  • 1/2 extra virgin olive oil
  • freshly cracked black pepper
  • Salt to taste
Combine all ingredients in a bowl and stir to mix. Keeps for a week or so.

Wednesday, June 19, 2013

Nectarine Carpaccio with Basil


We were paging through a recent Vegetarian Times when this recipe caught our eye. We had received some nectarines in our box and we got a few more at our local farmer's market just because it's that time of year.

I was also able to use some just-picked basil leaves from my backyard in this one.

We were having some friends over and we thought this would make a great appetizer.

It comes from Chef Eric Lechausseur, executive chef of Seed Kitchen in Venice, CA. In the write up, he describes how he likes the mixture of fruit and herb because "the nectarine's acidity combines with the freshness of basil for a wonderful flavor."

The ingredients are pretty simple:

  • nectarines
  • basil leaves
  • lemon
  • olive oil
  • salt
  • pepper

Here's how it works:


You want to start with nectarines that are neither too ripe or not ripe enough. Place the washed nectarine on a cutting board with the "crease" facing you. That way the pit is lined up to give you the maximum number of slices.

Slice off a bit of the peel from the right side to get the slicing started.

Start cutting thin slices.

When you run into the pit, turn the nectarine around and repeat the above on the other side.

You will have a small leftover section on either side. That's your reward for being the cook.

Arrange overlapping nectarine slices on a platter. In a bowl, combine the juice of half of a juicy lemon, just under 1/3 cup high quality olive oil, a generous dash of salt, and a good amount of cracked black pepper.
Get enough basil leaves for the number of nectarine slices you have. You will actually want small to medium sized leaves. Drizzle the dressing over the nectarine/basil slices
Serve out in the backyard enjoying the long days of June and the beginning of summer. We served it with a Viognier which worked well with this dish. We decided this was a keeper.


Sunday, June 9, 2013

Alice's Carrots

One of the staple items we get in the box is carrots. Bunches of Nantes carrots to be exact. Normally, I would peel and chop one or two raw carrots to add to a salad. Despite our best efforts, there were some weeks when we did not fully utilize the carrots.

While talking to some friends who also get the same CSA box, they said their "go to" recipe for carrots is the glazed carrots recipe (page 298) from The Art of Simple Food by Alice Waters. Since hearing about this, I've made this a handful of times and it's a keeper.

As Alice says, "it's more of a technique than a recipe."

It's deceptively simple and it makes an easy side dish.

It goes like this:

  • Peel the carrots (however many you need to feed). If the carrots are fairly thick, you can halve them.
  • Put the carrots in a pan and add water to come up about halfway up the carrots. Use a pan big enough to allow you to keep all of the carrots in a single layer.
  • Add a good pinch of salt and a pat of butter.
  • A few cracks of fresh pepper is always good.
  • Bring to a boil then turn down the heat to a simmer.
  • Cover the pan and simmer until water evaporates.
  • As the water level gets low, shake the pan to distribute the buttery glaze over the carrots.
  • I like to let the butter brown the carrots a bit in the pan.
  • Prior to serving, you can add some chopped herbs. Parsley, chives, and basil would work.