Monday, June 24, 2024

Cousin Betsy's Green Chile Breakfast Casserole

The first time I tasted this recipe, we had spent the night at a cousin's house that we were visiting. The next morning as we sipped our coffee, this pre-prepped casserole was simply put in the oven and before long we had a tasty and satisfying breakfast that filled us for our long drive home. While we enjoyed the recipe, what struck me more was the practical simplicity of her making this the day before and simply sticking it in the oven on Sunday morning as her guests were waking up and getting dressed. The work of preparing the breakfast dish was invisible to us since it was done before our arrival. 

It was the perfect reminder (as the home cook) of the beauty of having some "make ahead" simple recipes so that the cook doesn't have to stress and can interact more with the guests.

This recipe is hardly unique nor is it a creation of mine. And it doesn't have to be a "breakfast casserole." It could be served for a brunch or even a dinner or lunch. 

You can easily search the title below and find an endless number of variations. The ingredients are simple and are made up of items that can easily be found in supermarkets across the country. I followed my cousin's recipe but I also tried some of the variations out there on the Web (including the cottage cheese version!). I blended her recipe with a few others to create this version. I've made it a number of times and the results are consistent. But, this is another recipe that you can tweak to make something that's just "yours." 

Oh, and don't buy the bags of pre-shredded cheese. Buy a block and shred it yourself at home. The bags of pre-shredded cheese are treated with an additive to prevent it from clumping. This additive causes the cheese to not melt the same as cheese you shred at home. For this recipe, the melted cheese topping is essential. Plus, whole cheese is less expensive by weight. 

Green Chile Egg Breakfast Casserole

Ingredients:

  • Eggs - 8
  • Green chopped chiles - 7 oz., drained (or try two 4 oz. cans for a bit more spice)
  • Monterey Jack cheese - 6 oz., grated
  • Sharp Cheddar cheese - 8 oz., grated
  • Milk - 1/2 cup
  • Flour - 2 Tbsp.
  • Baking soda - 1 Tbsp.
  • Garlic salt - 1/2 tsp.
  • Black pepper - 1/2 tsp.

Directions:
  1. Preheat oven to 350 degrees.
  2. Spray some non-stick oil in an 11 x 7 rectangular baking dish.
  3. Sprinkle a thin layer of the cheeses on the bottom of the baking dish. Use more of the jack cheese but include some cheddar. 
  4. Evenly cover the cheeses with the green chiles. 
  5. In a large bowl, add the flour. Using a whisk, add a tiny bit of the milk and whisk it into a paste. Slowly, add more milk and continue to whisk. The goal is break up any clumps of flour. Whisking constantly, slowly add in the rest of the milk. 
  6. One at a time, break the egg into the same bowl and whisk each one to mix them up before adding the next egg. Continue until all eggs are in and mixed.
  7. Add the baking soda, black pepper, and garlic salt. Whisk to combine.
  8. Pour the egg mixture into the casserole covering all of the cheese and chiles.
  9. Sprinkle the top with the remaining cheeses (heavier on the cheddar) and bake in the middle rack for 30-35 minutes. If this is prepped the night before and kept overnight in the refrigerator, increase cooking time to 40-45 minutes. You want to look for a topping of golden cheese that is ever so slightly browned on top.
  10. Remove from the oven and let sit for at least 5 minutes.  
You can serve this with salsa, sour cream, or a hot sauce like Tabasco or Crystal on the table and let each person decide what they want to add, if anything. Leftovers can be refrigerated and reheated and will last about four or five days.


.

Tuesday, April 9, 2024

Crispy Moroccan Tofu with Grains and Greens

The scenario: You both come home late from work and you're both tired. Dinner needs to be on the table ASAP. What do you do?

This dinner was originally created out of a coincidence of ingredients that we just happened to have on hand in the house on just such a night. Some good friends had recently introduced us to the tasty and convenient Seeds of Change grain packets and they were sitting in the pantry. We had noticed and purchased this package of Hodo Moroccan-flavored tofu at the supermarket and it was in the fridge. We ALWAYS have a jar of Costco pesto in the fridge (plus more in the freezer). We were in the exact position described above one night so I began to assess what we had on hand that could be transformed into a dinner. Things were starting to come together. 

Some weeknight years ago, I tossed together these disparate ingredients for a quick weeknight meal. We loved it enough that it has been part of the rotation of the sometimes-needed quick, weeknight meals. Nothing glamorous here; but it's a tummy- filling, healthy, high-fiber recipe for those late weeknight meals. A meal for the two of you--not fancy dinner party fare.

The key to this meal's satisfaction is the "toothiness" of the slightly crispy grains (similar to the crispy crust on paella called socarrat). At the end, you let the mix sit unstirred in the skillet over the heat and allow the bottom to get just a bit crispy. You can let it sit longer if you want more crispiness.

There are just a few key ingredients:

Hodo Moroccan Tofu Cubes
We bought one time a year or two ago just try them out. We enjoyed them enough to get more every once in awhile. At this time, I don't see it on Amazon (though they do carry other Hodo products). We get it at our local Safeway. 


We bought these at the recommendation of some friends. I've purchased these at my local Costco and I've ordered them through Amazon if you want a twelve pack. Single envelopes are also available at Safeway. Look for them at your local supermarket.


Once you have those two ingredients (or maybe your own facsimile) you can keep those in the fridge and pantry. 

Crispy Moroccan Tofu with Grains and Greens

Ingredients:

  • 1 package (8 oz.) Hodo Moroccan Tofu Cubes
  • 1 package (8.5 oz.) Seeds of Change Quinoa and Brown Rice Mix
  • 3 - 4 cups arugula (other greens could also work)
  • 2 Tbsp. Basil pesto
  • Olive oil
  • Black pepper
  • Red chili flakes (optional)
Directions:
  1. Massage the unopened packages of tofu and quinoa/rice to break up the contents. 
  2. Heat a 12" skillet with a good drizzle of olive oil over medium high heat.
  3. Add the package of tofu breaking up the large chunks with a spatula. Stir only occasionally for about 5 minutes or until tofu gets some browning.

  4. Add the Seeds of Change envelope and stir to mix.

  5. Drizzle with more olive oil (about 2 Tbsp.) to moisten the grains and stir to mix.
  6. Add the greens and stir until wilted.

  7. Add the pesto, black pepper, and red pepper flakes (optional).
  8. Stir to mix and let the mixture sit for 3-4 mins. on medium heat to get some crispiness on the bottom.
    Finished dish

  9. Serve immediately on bowls or plates. 
One skillet clean up. You just might have some leftovers for lunch the next day!

Wednesday, February 7, 2024

Vegetarian Split Pea Soup

 A friend gave us a shopping bag of split peas, lentils, and beans that they decided they were not going to use. Not wanting this all to go to waste, I resolved to find ways to utilize these legumes. I decided to begin with the two bags of dried split peas. Then, this being a chilly December, I started with the most obvious of choices: split pea soup. I've made this recipe a few times, tweaking it a bit each time, until I got it to where I felt it should be.

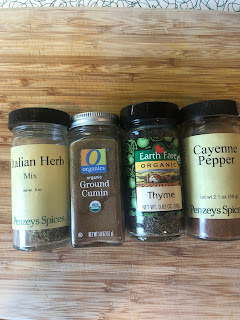
Some people like a smooth split pea soup but that's not the way I grew up eating it. With the omission of the ham that was present in my childhood bowl of soup, it's nice to have something to bite into. This recipe also includes chunks of Yukon Gold potatoes which impart a creaminess to make this feel more like a real meal that feels satisfying and warming. The ground cumin and a pinch of cayenne adds a rich, warm earthiness to the soup.

Two things to monitor in this recipe: salt and time.

Salt: The traditional ham or ham hock added a lot of salt to the soup. Start with the 2 teaspoons in the beginning and you can add more to taste in step 6. Also, pay attention to the amount of salt in the store-bought broth. 

Time: Prepare this soup in the morning, let the flavors marry all day, and serve that night. Or, better yet, prepare after dinner for tomorrow's dinner. This way the flavors calm down and blend and the soup is more integrated. The soup can also be stored in an airtight container in the fridge for about three days. It can also be frozen.

Vegetarian Split Pea Soup 

Ingredients:

  • Olive oil - 1/4 cup
  • Split green peas - 1 1/2 cups, dried
  • Yukon Gold potatoes - 2 medium, peeled and diced
  • Yellow onion - 2 medium, peeled and diced
  • Carrots - 4, peeled and cut into bite-sized pieces
  • Celery - 4 stalks, cut in half lengthwise and chopped
  • Sea salt - about 2 teaspoons
  • Black pepper - 1 teaspoon
  • Italian seasoning - 1 tablespoon
  • Ground cumin - 1 1/2 teaspoon
  • Cayenne - 1 pinch
  • Garlic - 4 cloves, minced
  • Dried thyme - 1 teaspoon
  • Vegetable broth - 2 32 oz Tetra Pak boxes (or 8 cups if using canned or homemade)
  • Bay leaves - 2
  • Lemon juice - from 1/2 lemon (optional)

Directions:
  1. Place the dried split peas in a large bowl. Cover with water and soak for at least 4 hours and up to 8 hours. 
  2. Prep all vegetables. Drain the split peas into a colander and rinse. 
    Prepped ingredients

  3. Heat the olive oil a deep stock pot over medium heat. Add the onion, carrot, celery, salt, and pepper. Cook until vegetables are softened and onions begin to turn golden (about 10 minutes). You will see how the salt forces the veggies to give up their water which will steam. This is a good sign.
  4. Add garlic, Italian seasoning, cumin, and thyme, and cook, stirring constantly, for a minute or two.
    Additions

  5. Add the potatoes, split peas, and bay leaves. Add the vegetable stock. Bring to a boil, stirring occasionally to prevent sticking. Once boiling, reduce heat to low and simmer uncovered for 60-90 minutes (check by sampling the peas to see if they are softened after 60 minutes). While cooking, the soup should just be bubbling but not rapidly boiling. Cook until split peas are cooked down and softened and soup has thickened. Stir occasionally. Add more broth (or water) if it gets too thick. Remove the pot from the heat and let it cool a bit. Remove and discard the bay leaves. Add the lemon juice (and zest) and the pinch of cayenne.
    Next step

  6. Using an immersion blender or a blender, puree a portion of the soup to your liking. Taste for salt and pepper. 
  7. Turn off heat and let ingredients marry. 
  8. When ready to serve, reheat (about 20 minutes) over medium-low heat stirring regularly to prevent sticking. 
    Bowl of soup

    Soup in bowl